1- Go to your organization SSO settings screen
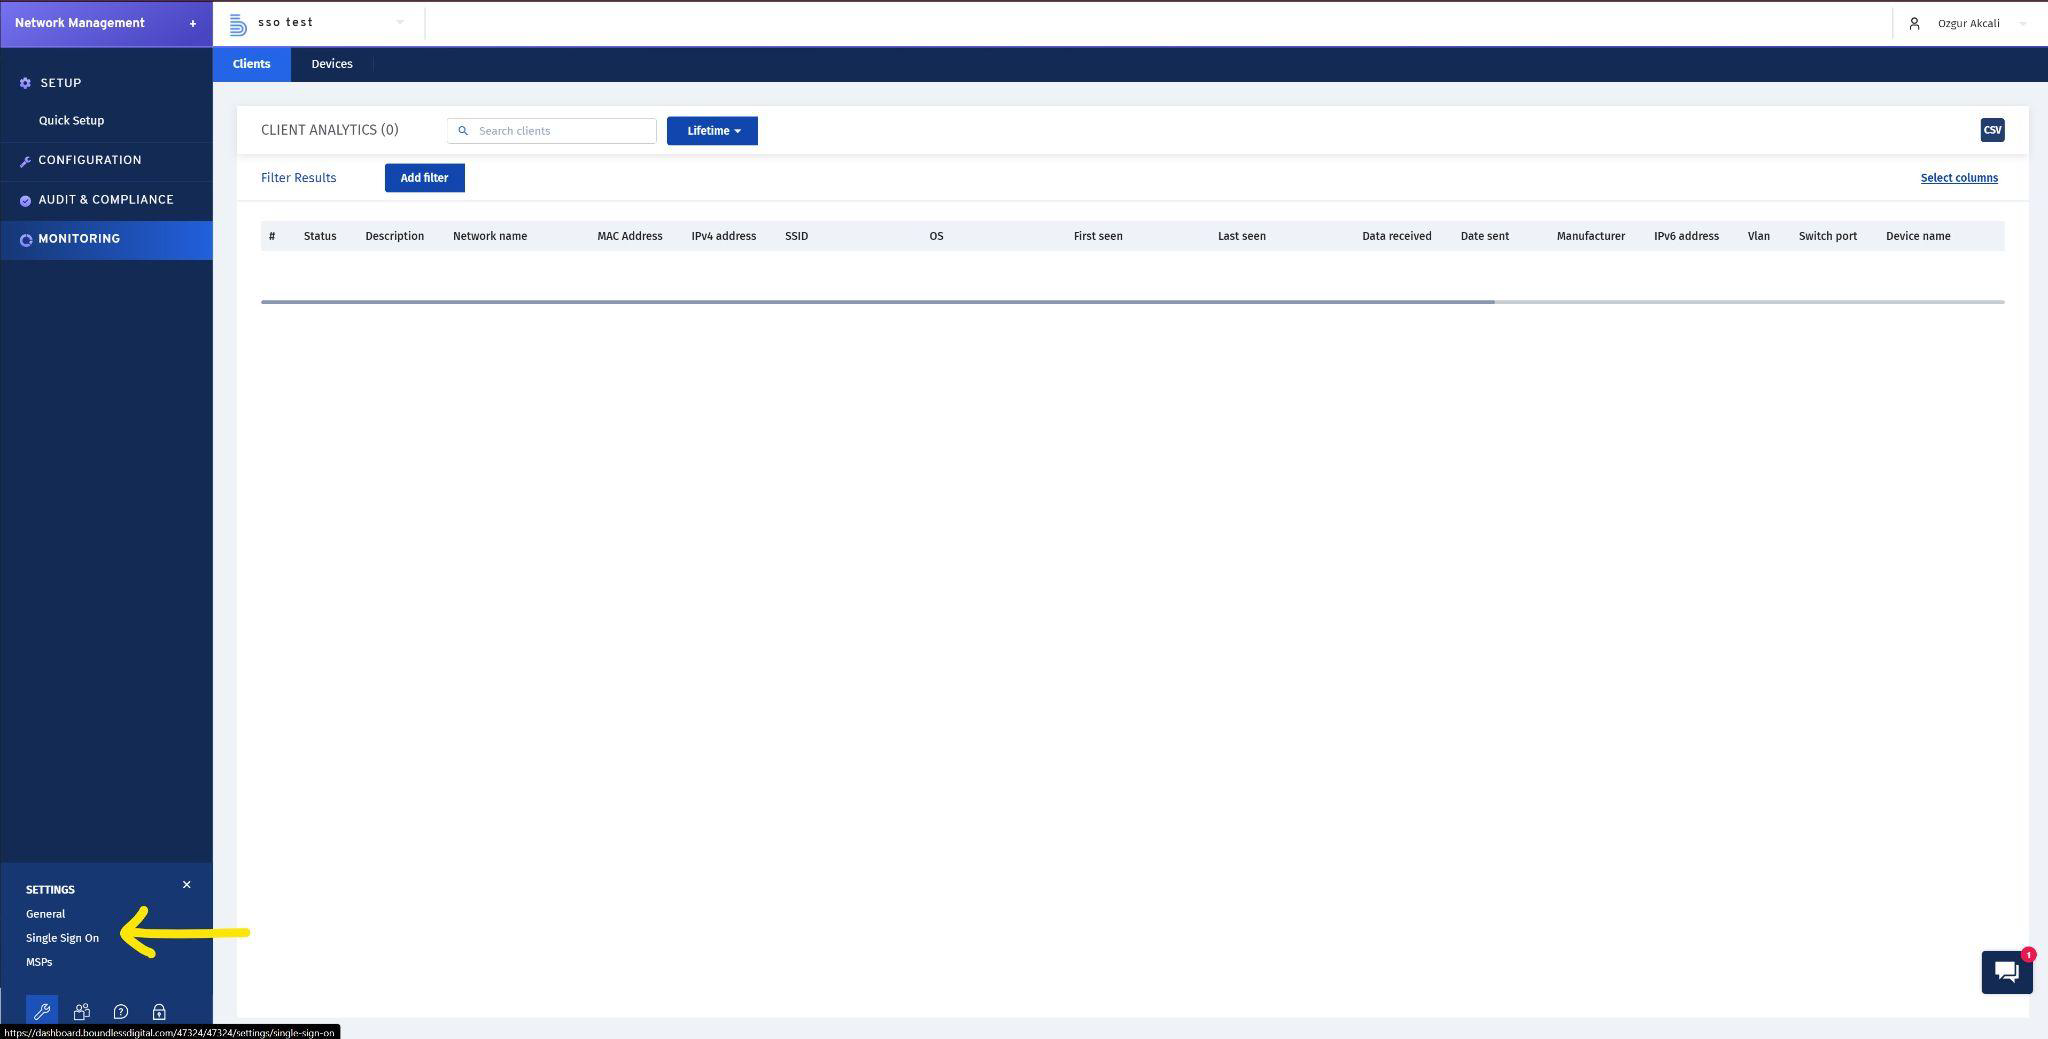
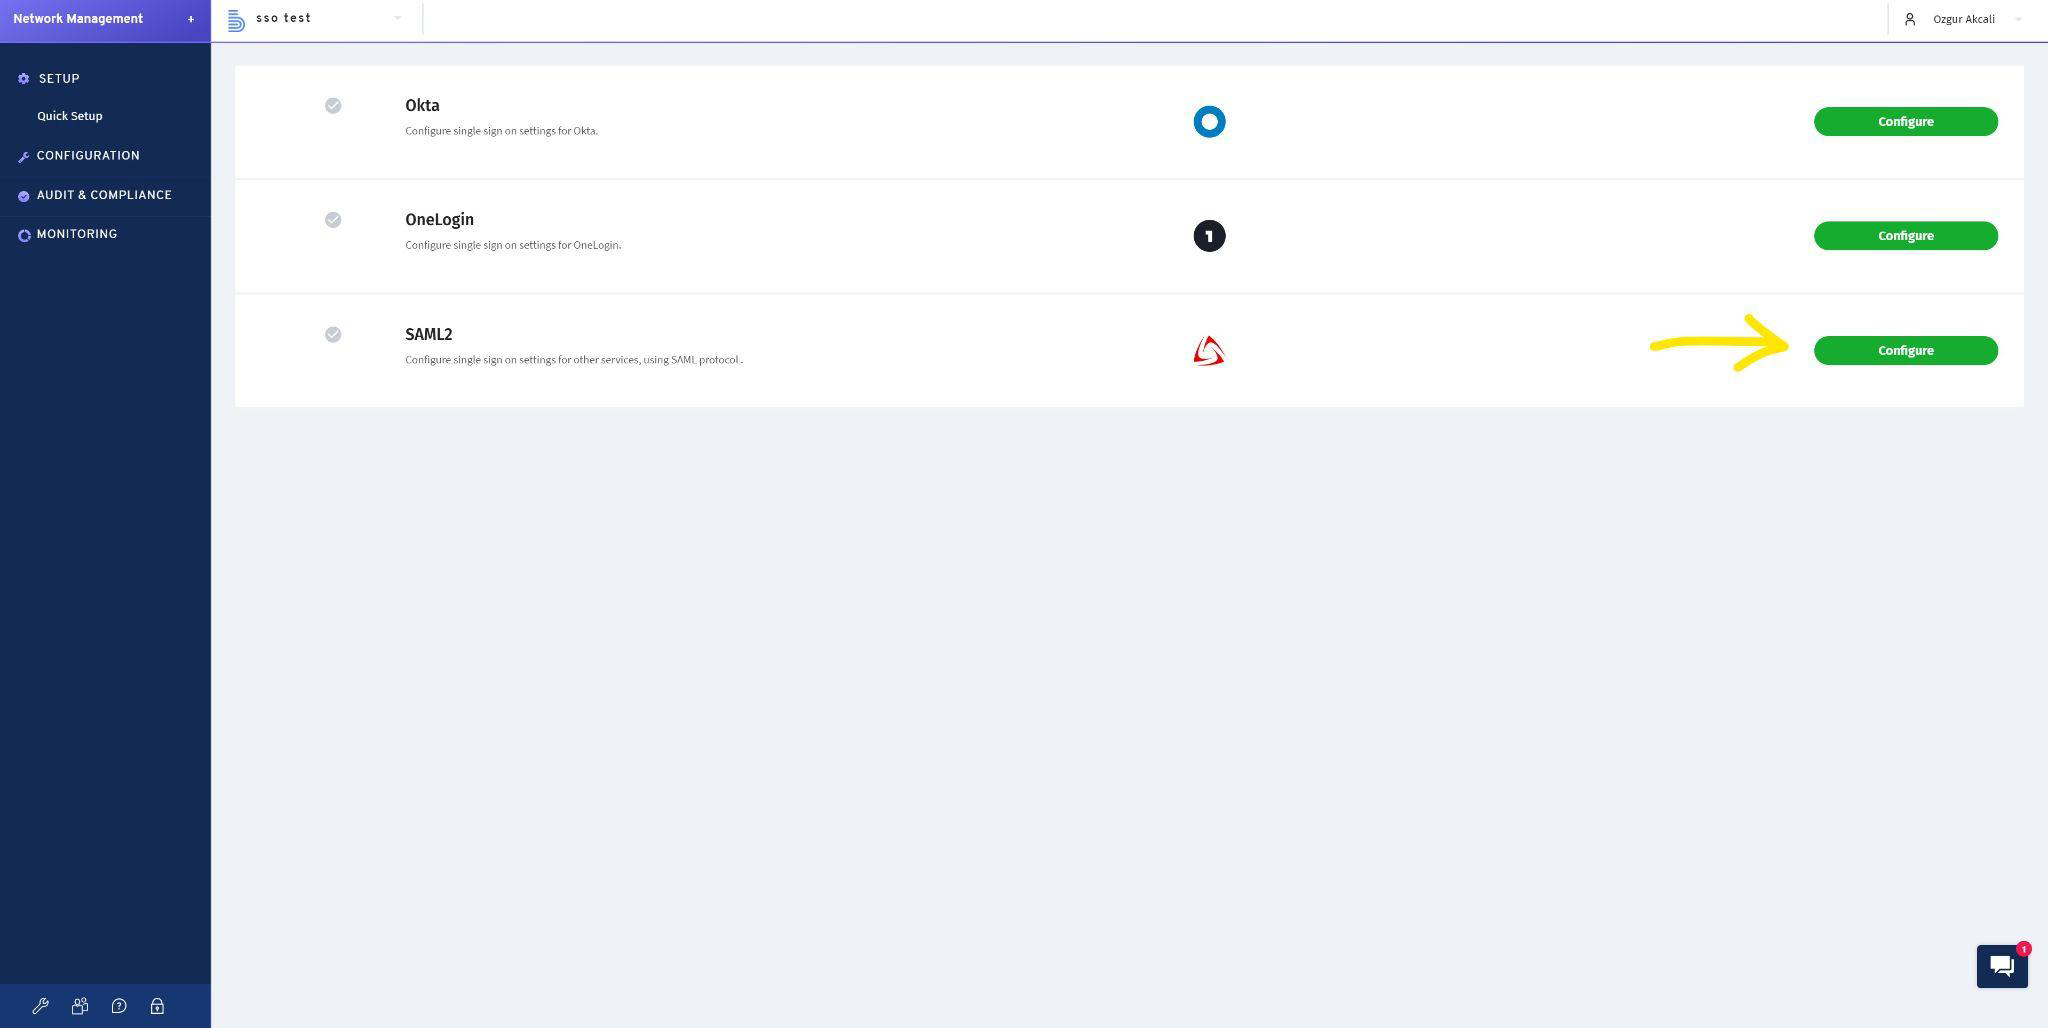
2 - Click Configure on SAML2
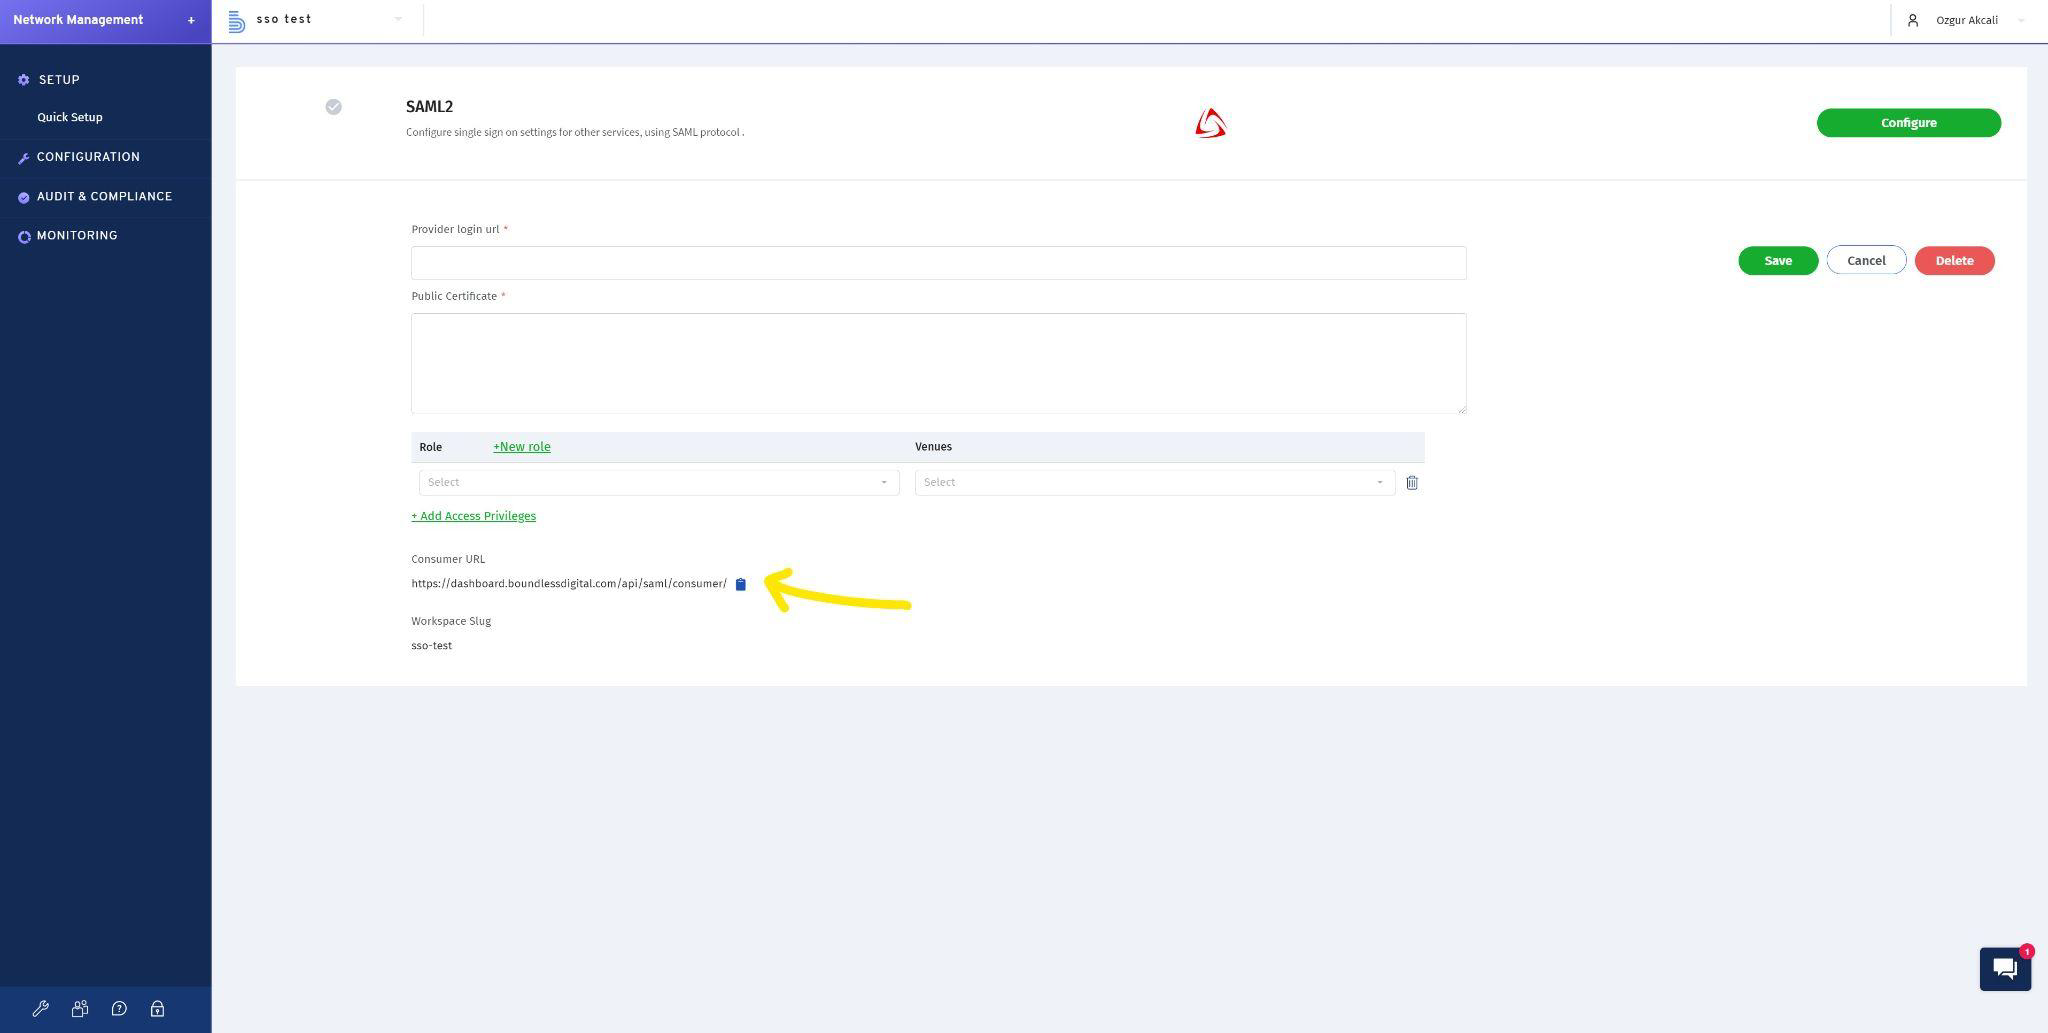
3 - Take note of Consumer URL here, we will use it later
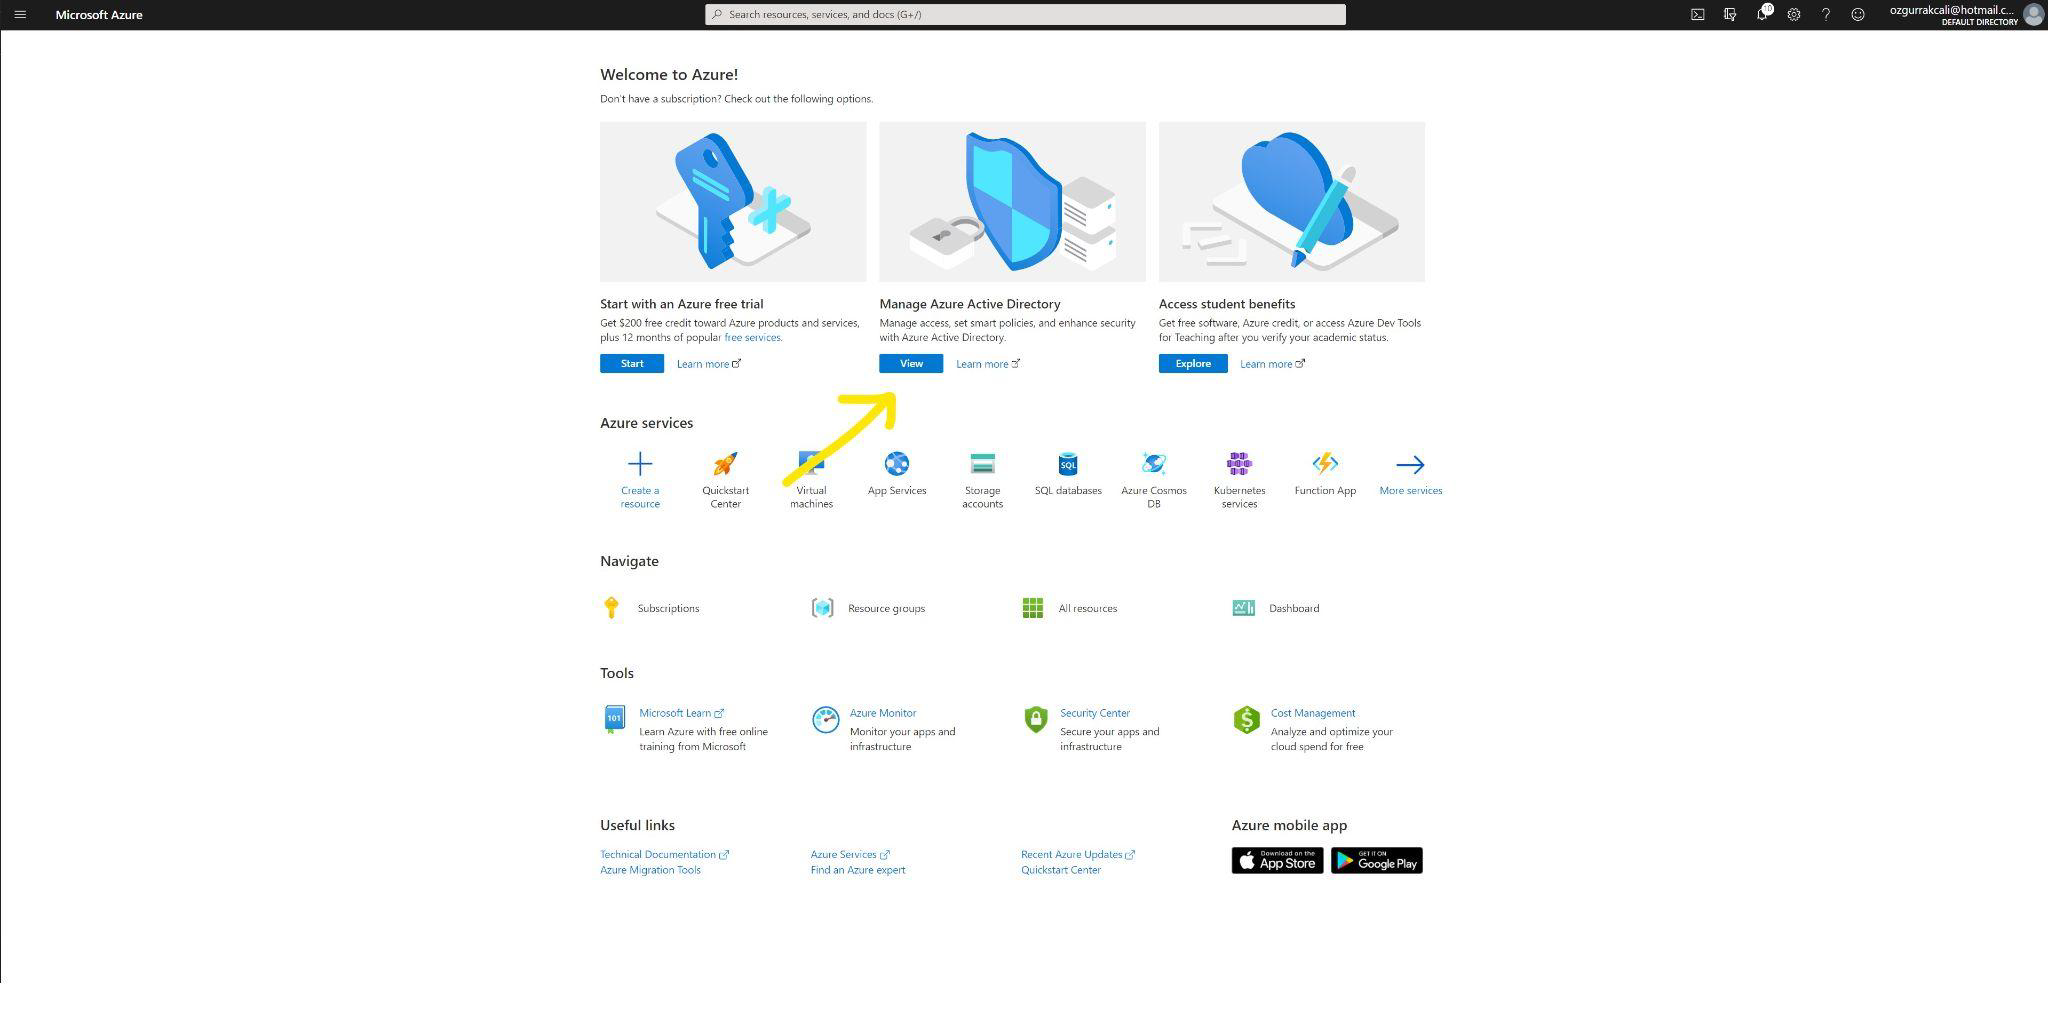
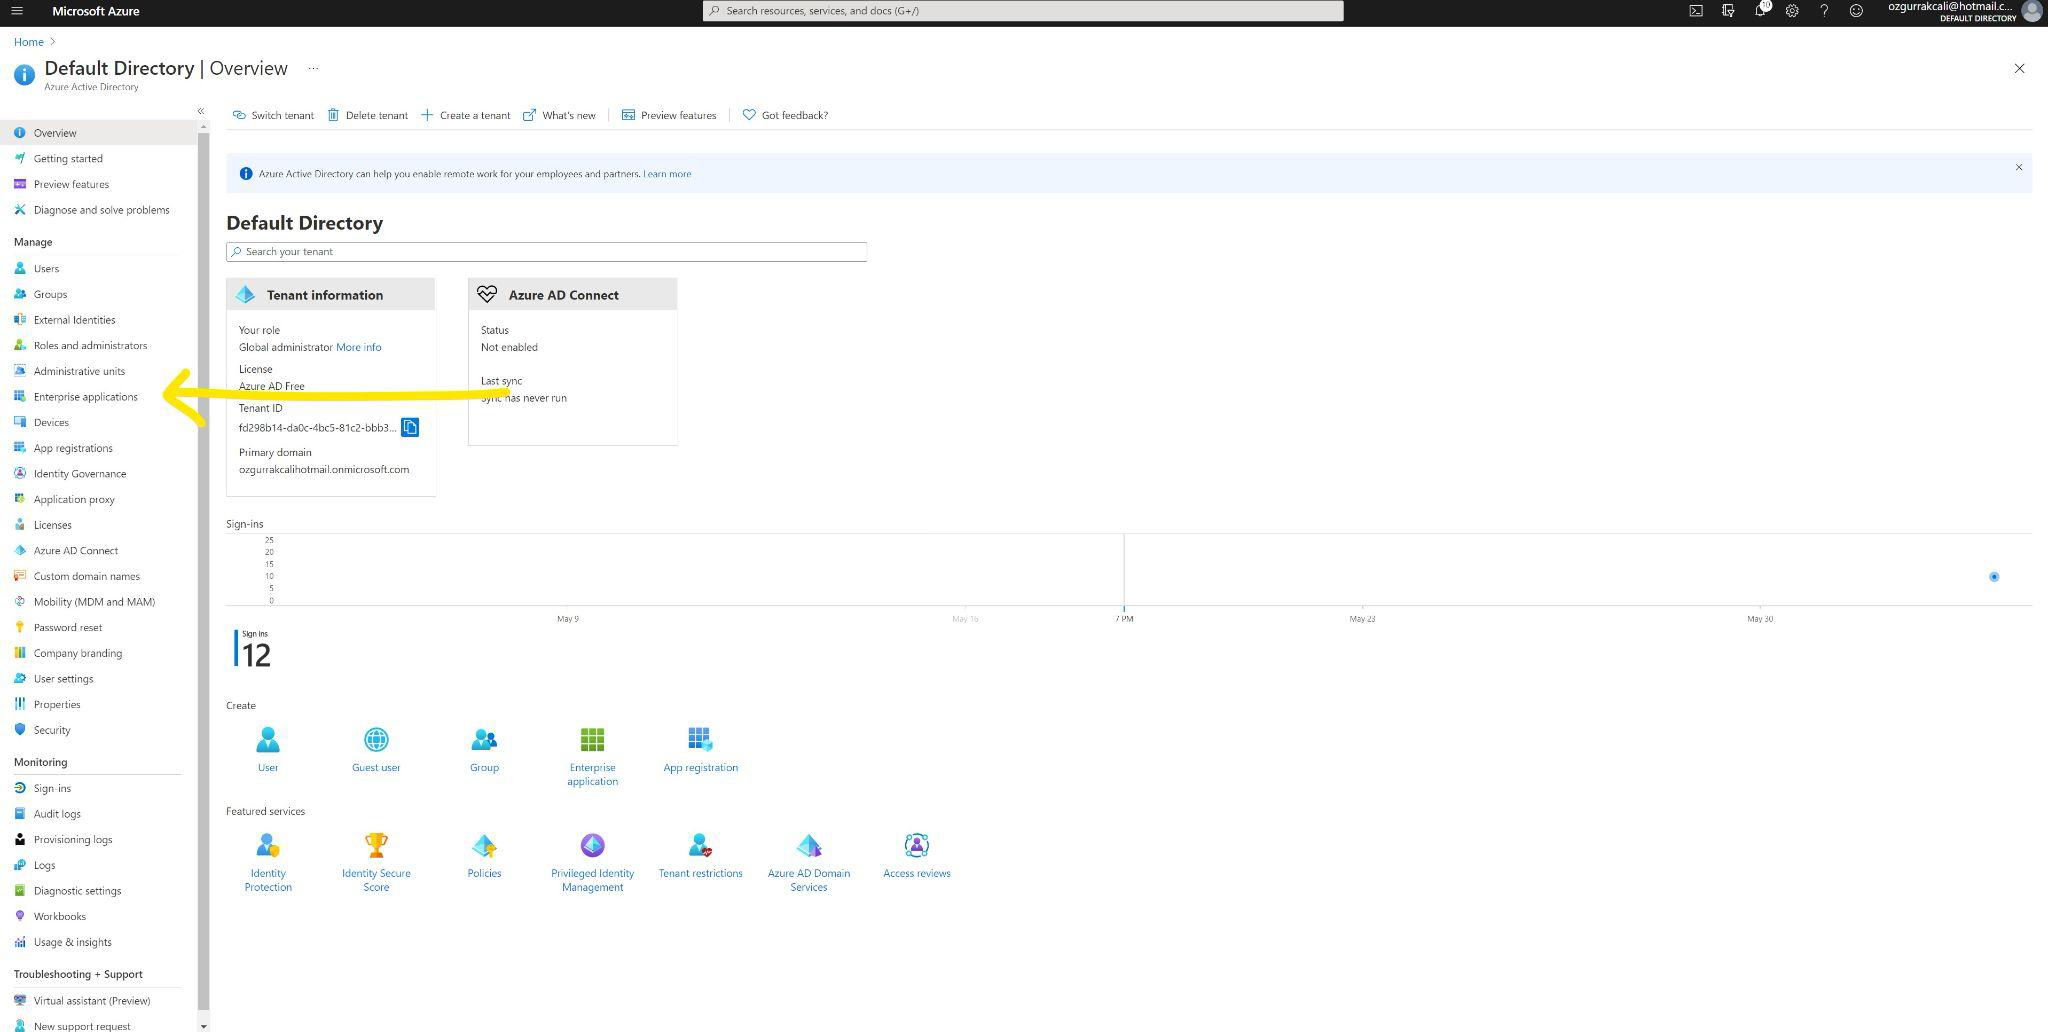
4 - Now log into your Azure account, and click View under Manage Azure Active Directory
5 - Click Enterprise Applications link
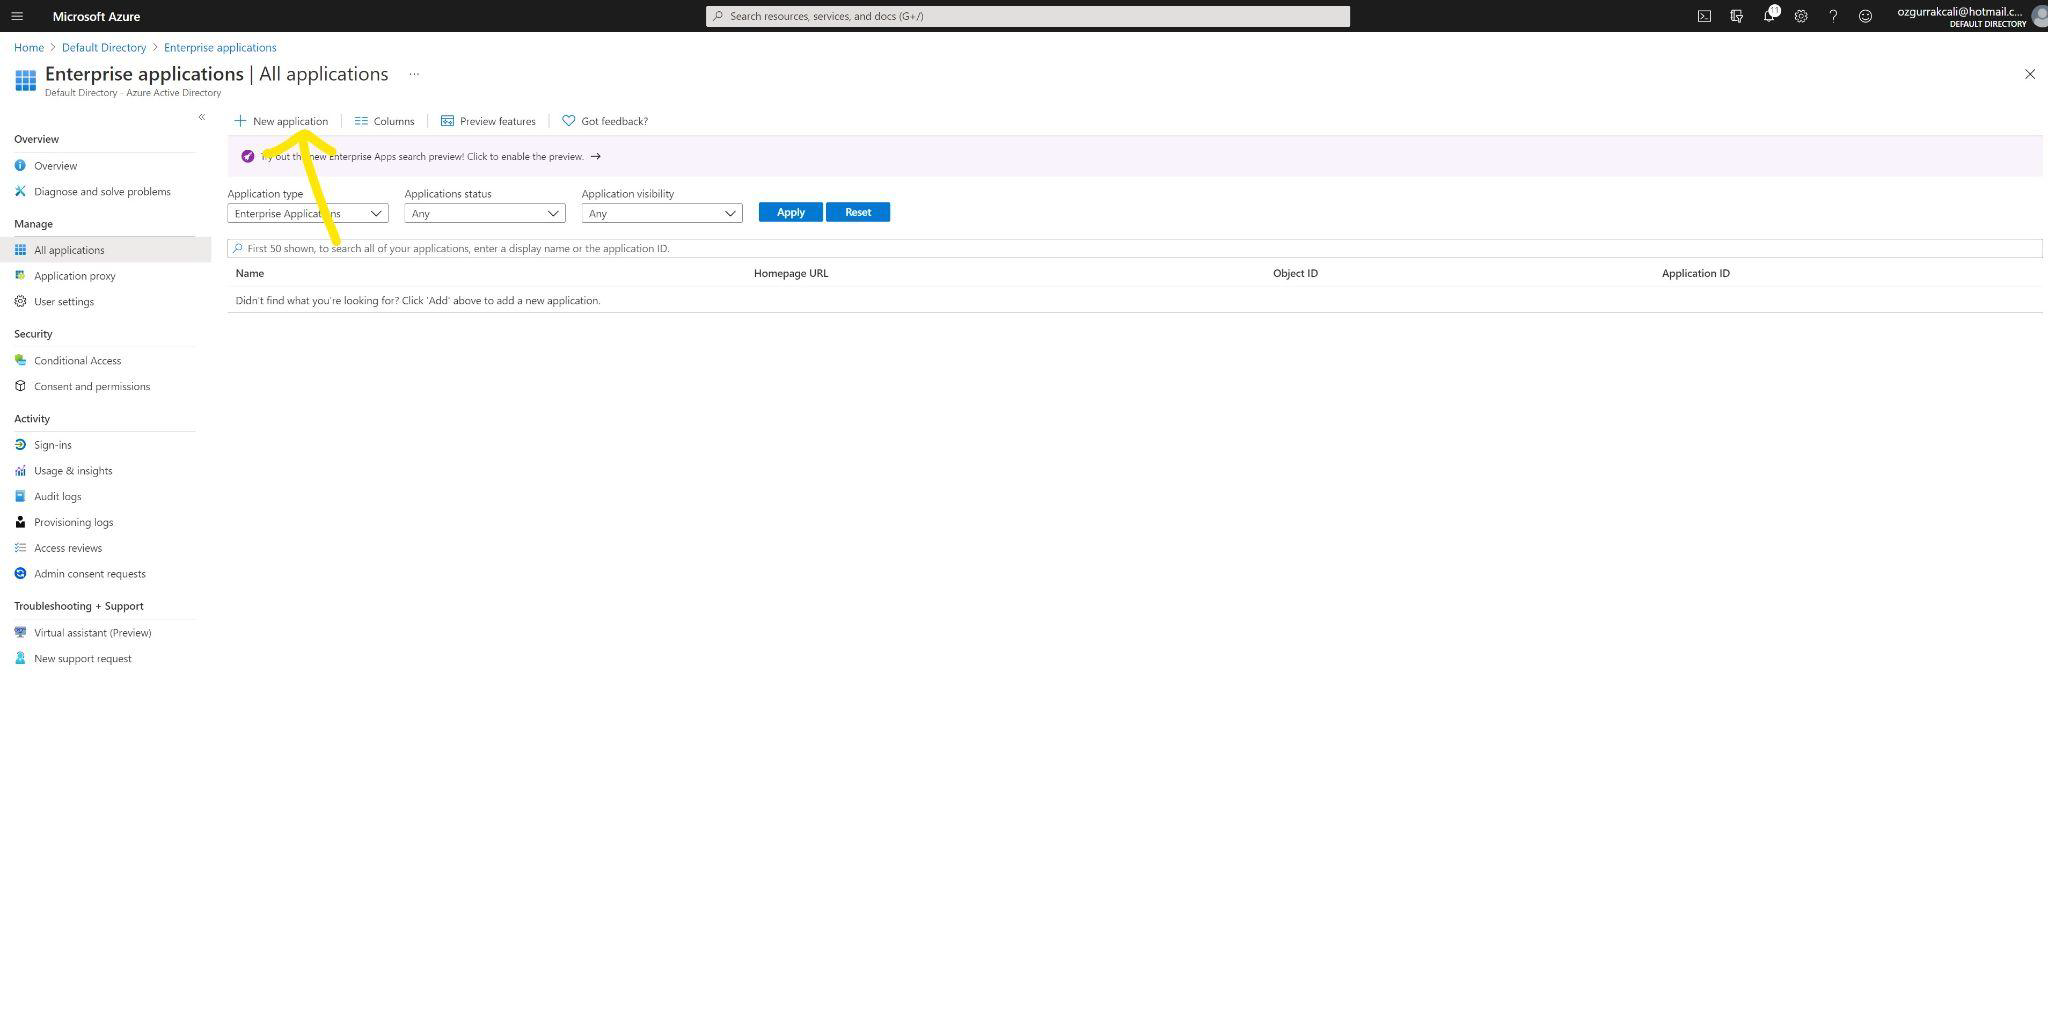
6 - Click New Application button
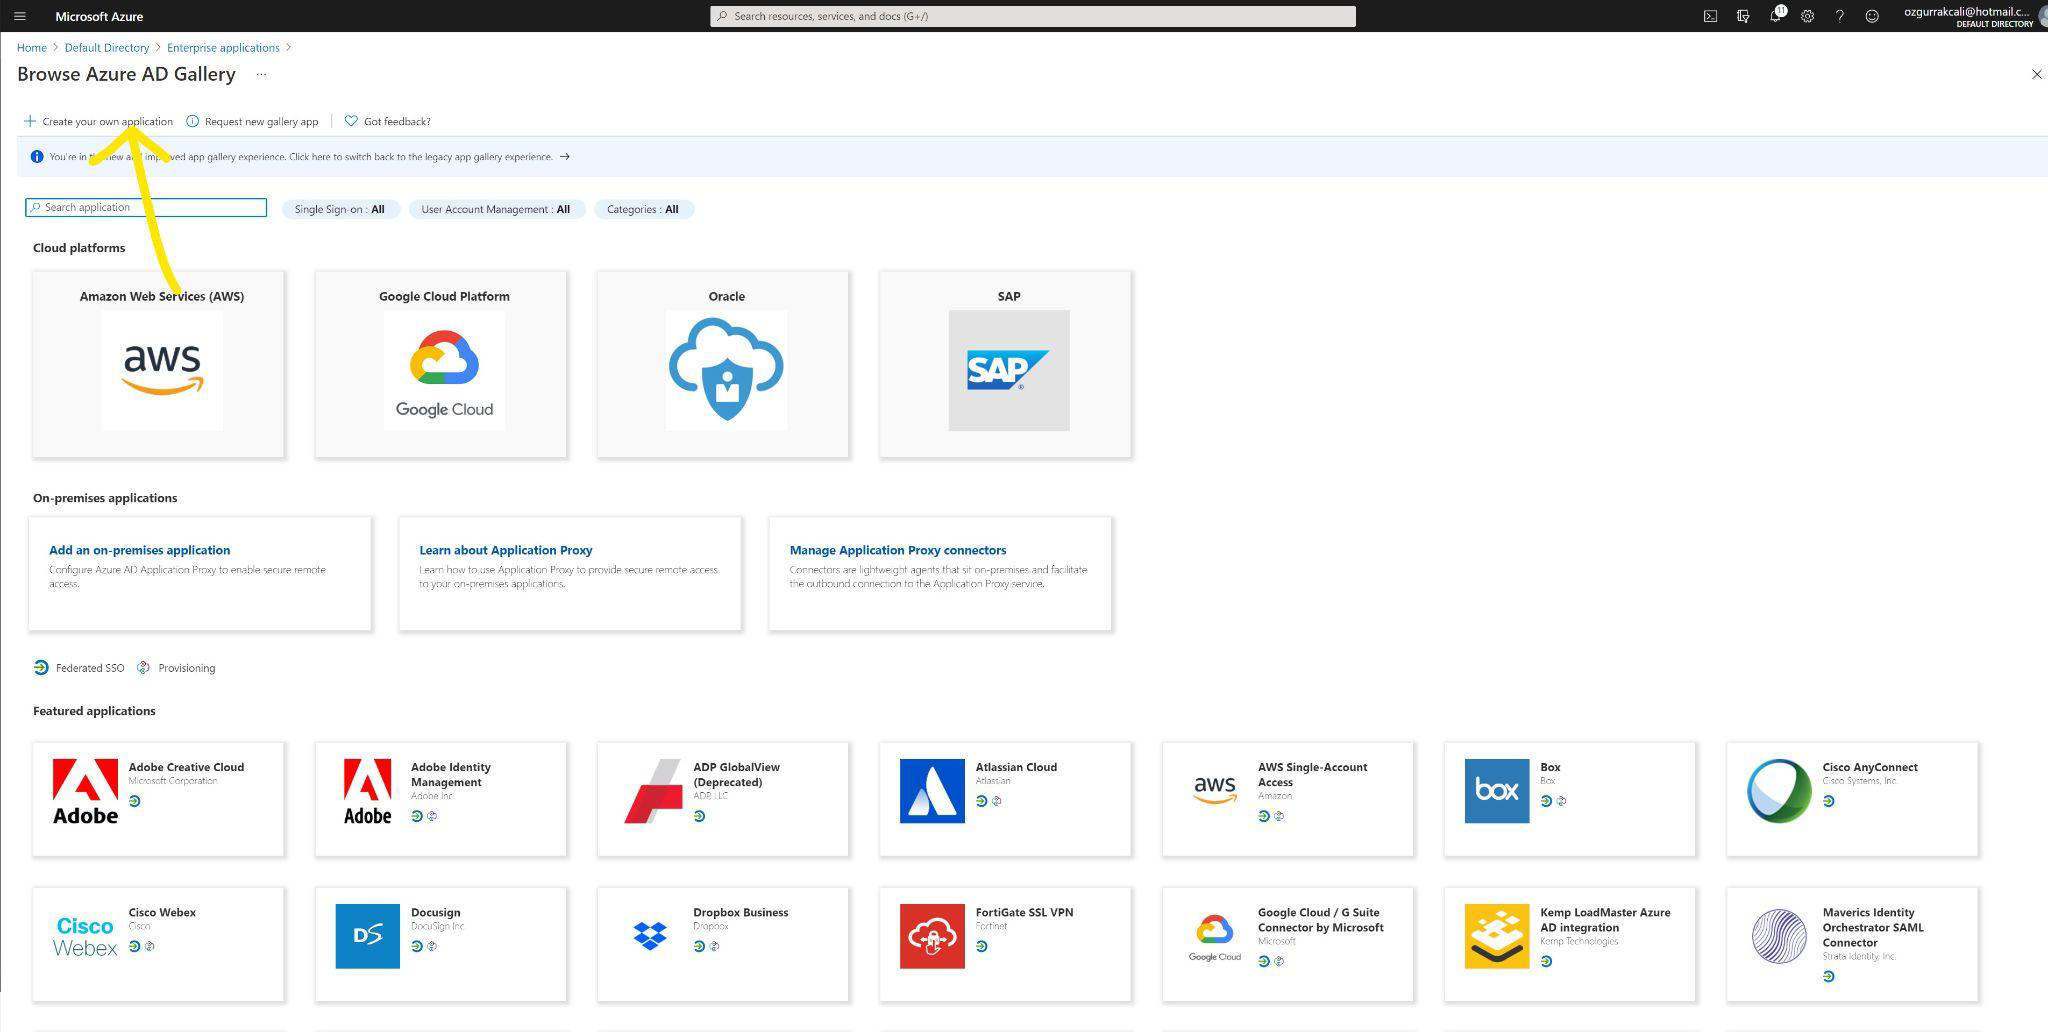
7 - Click Create your own application
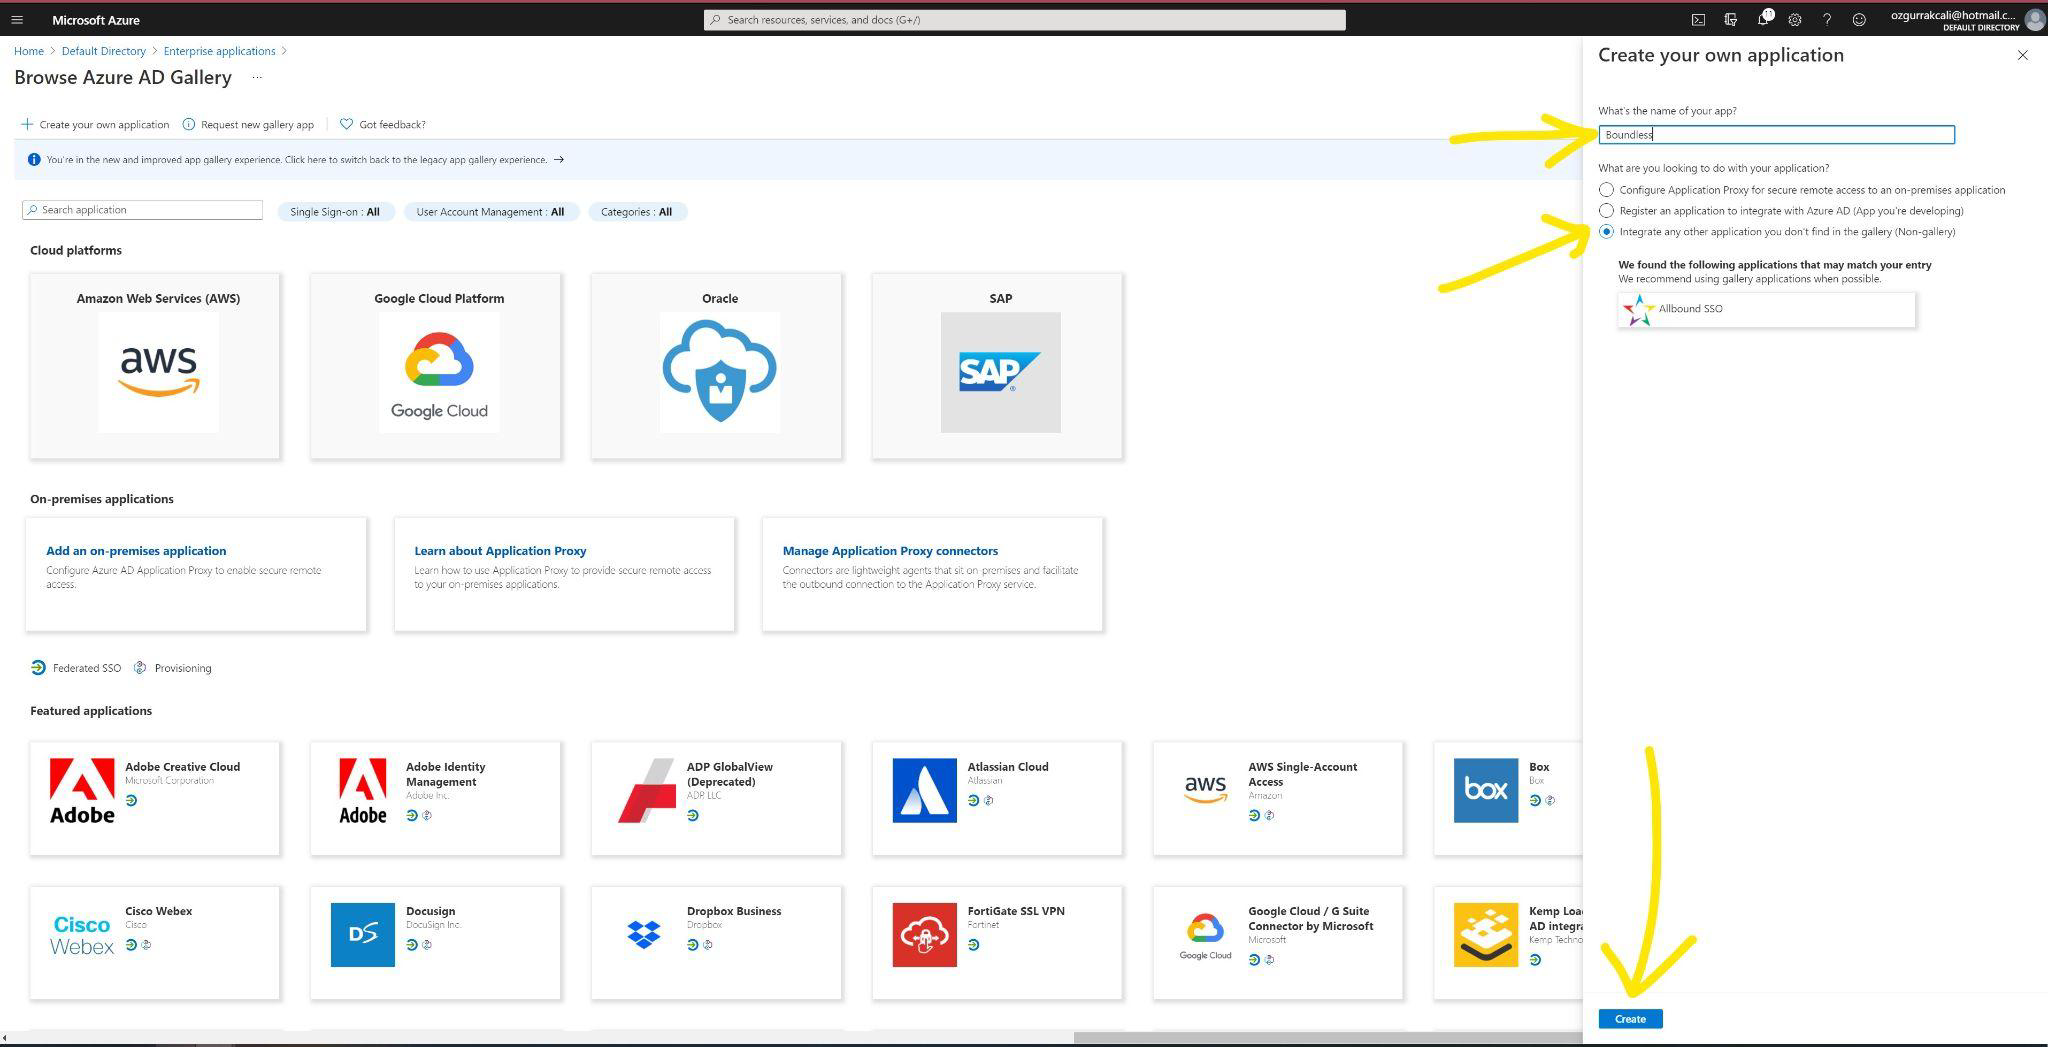
8 - Enter application name, select Non-gallery option, and click create
9 - Click Single sign-on link on the menu

10 - Select SAML option

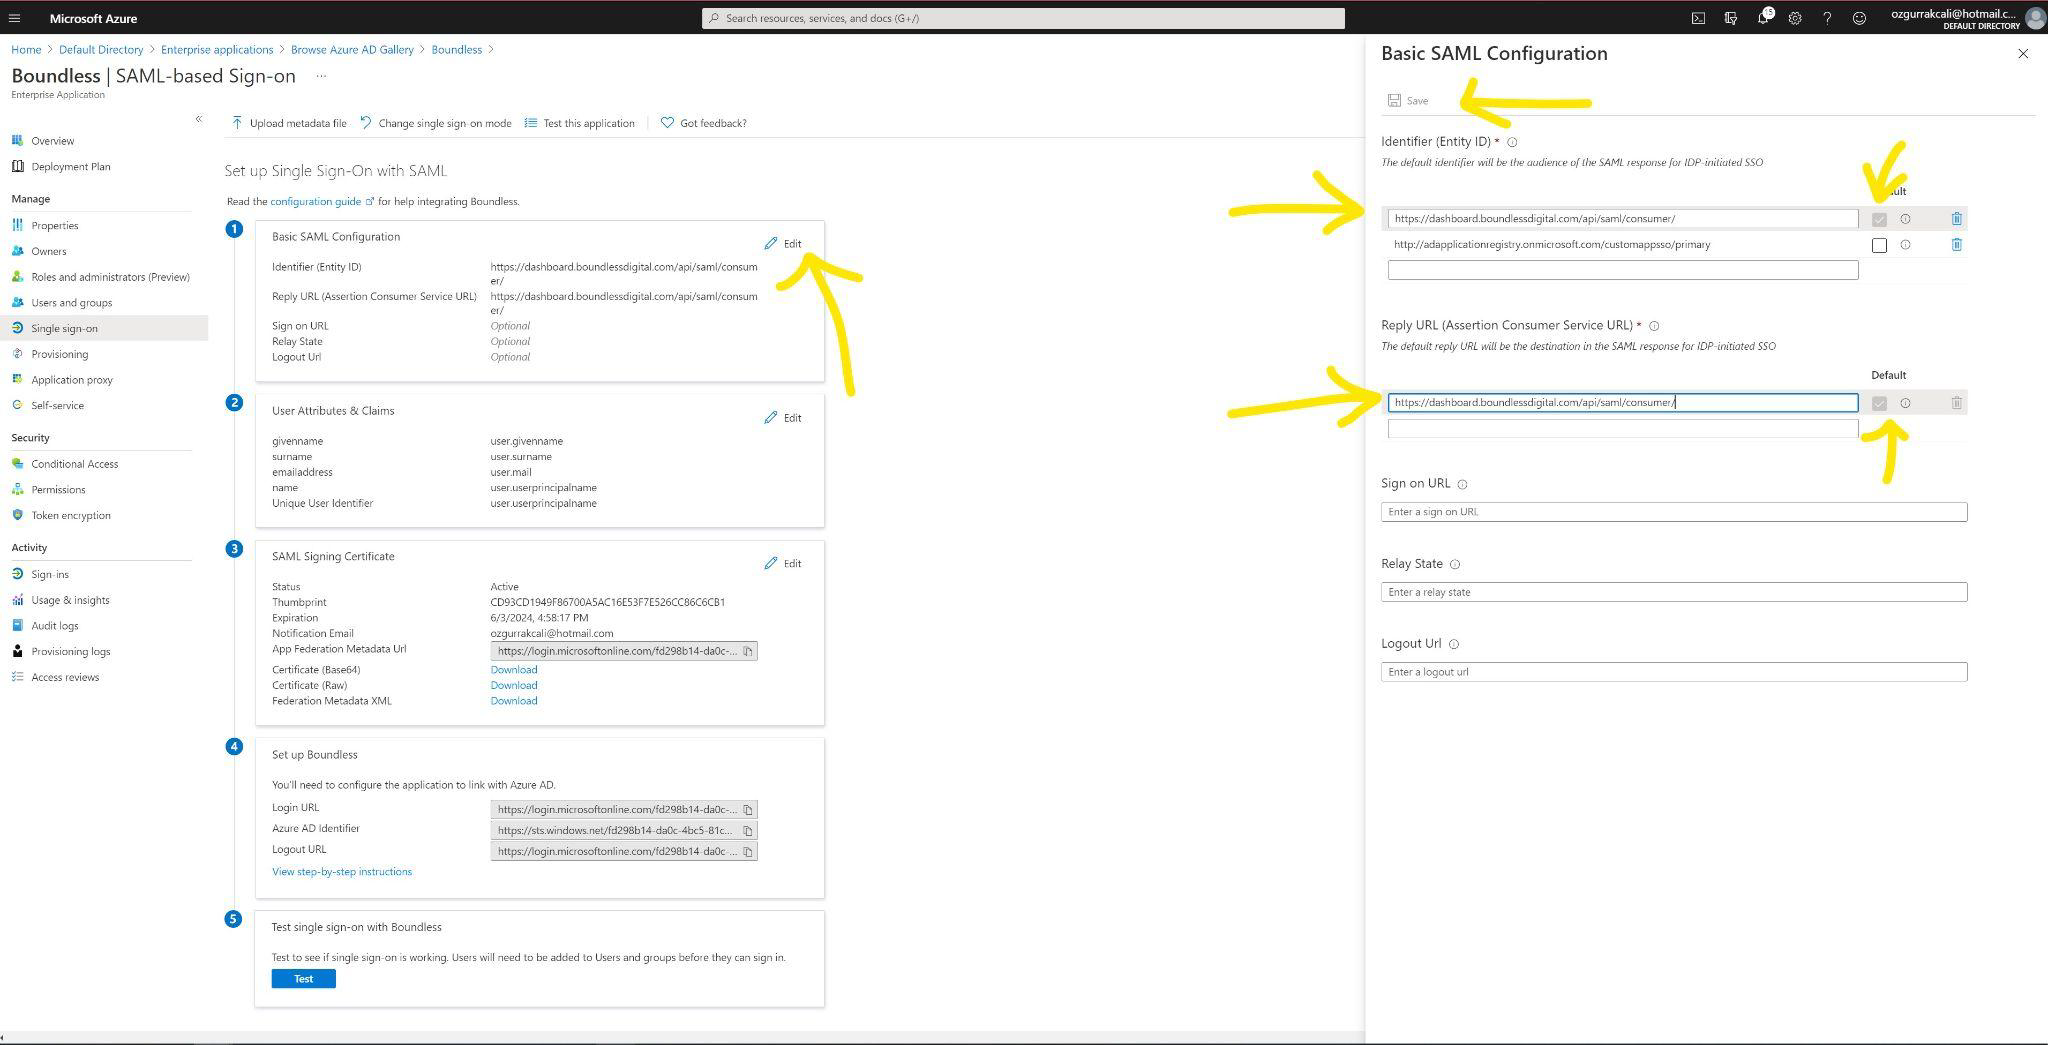
11 - Enter Consumer URL you noted in step #3, and enter it into Entity ID and Assertion Consumer Service URL fields. Select both as the Default option, and click Save
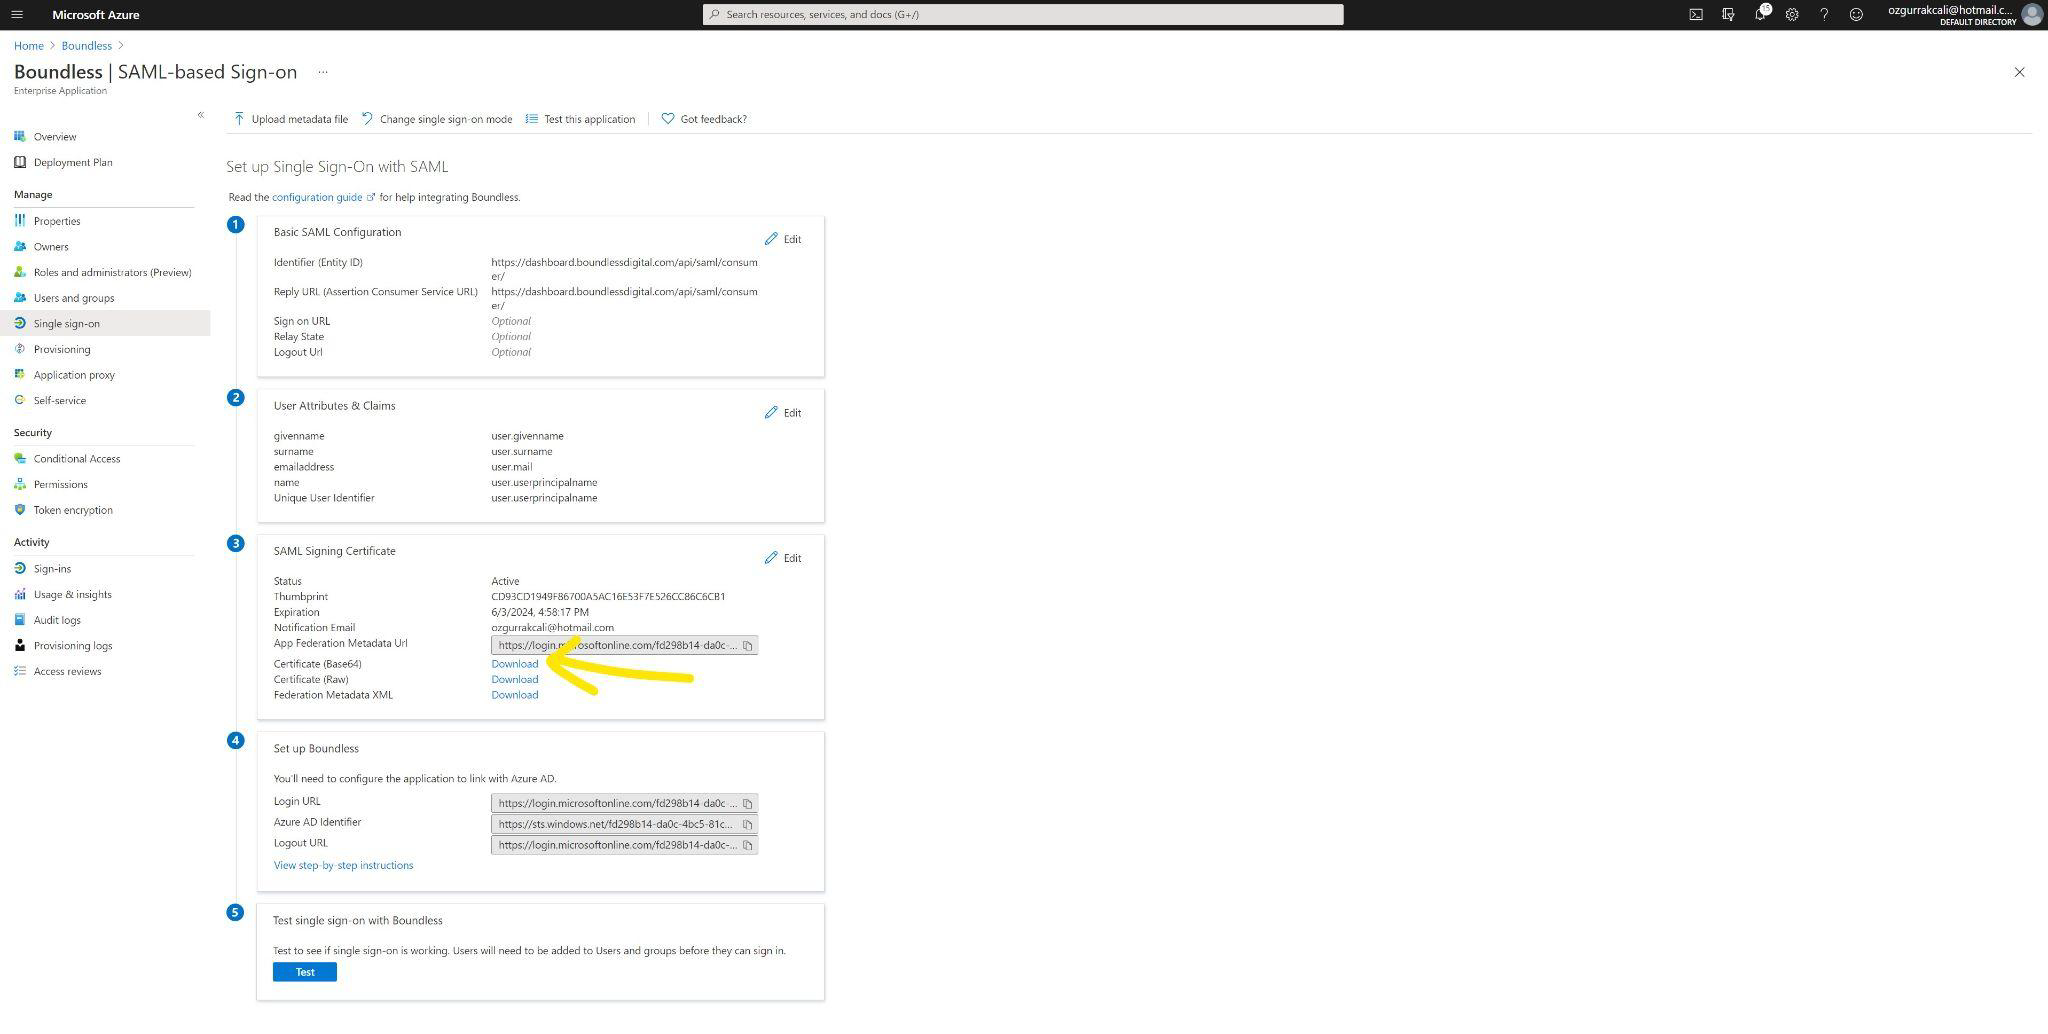
13 - Download the public certificate (Base64 version)
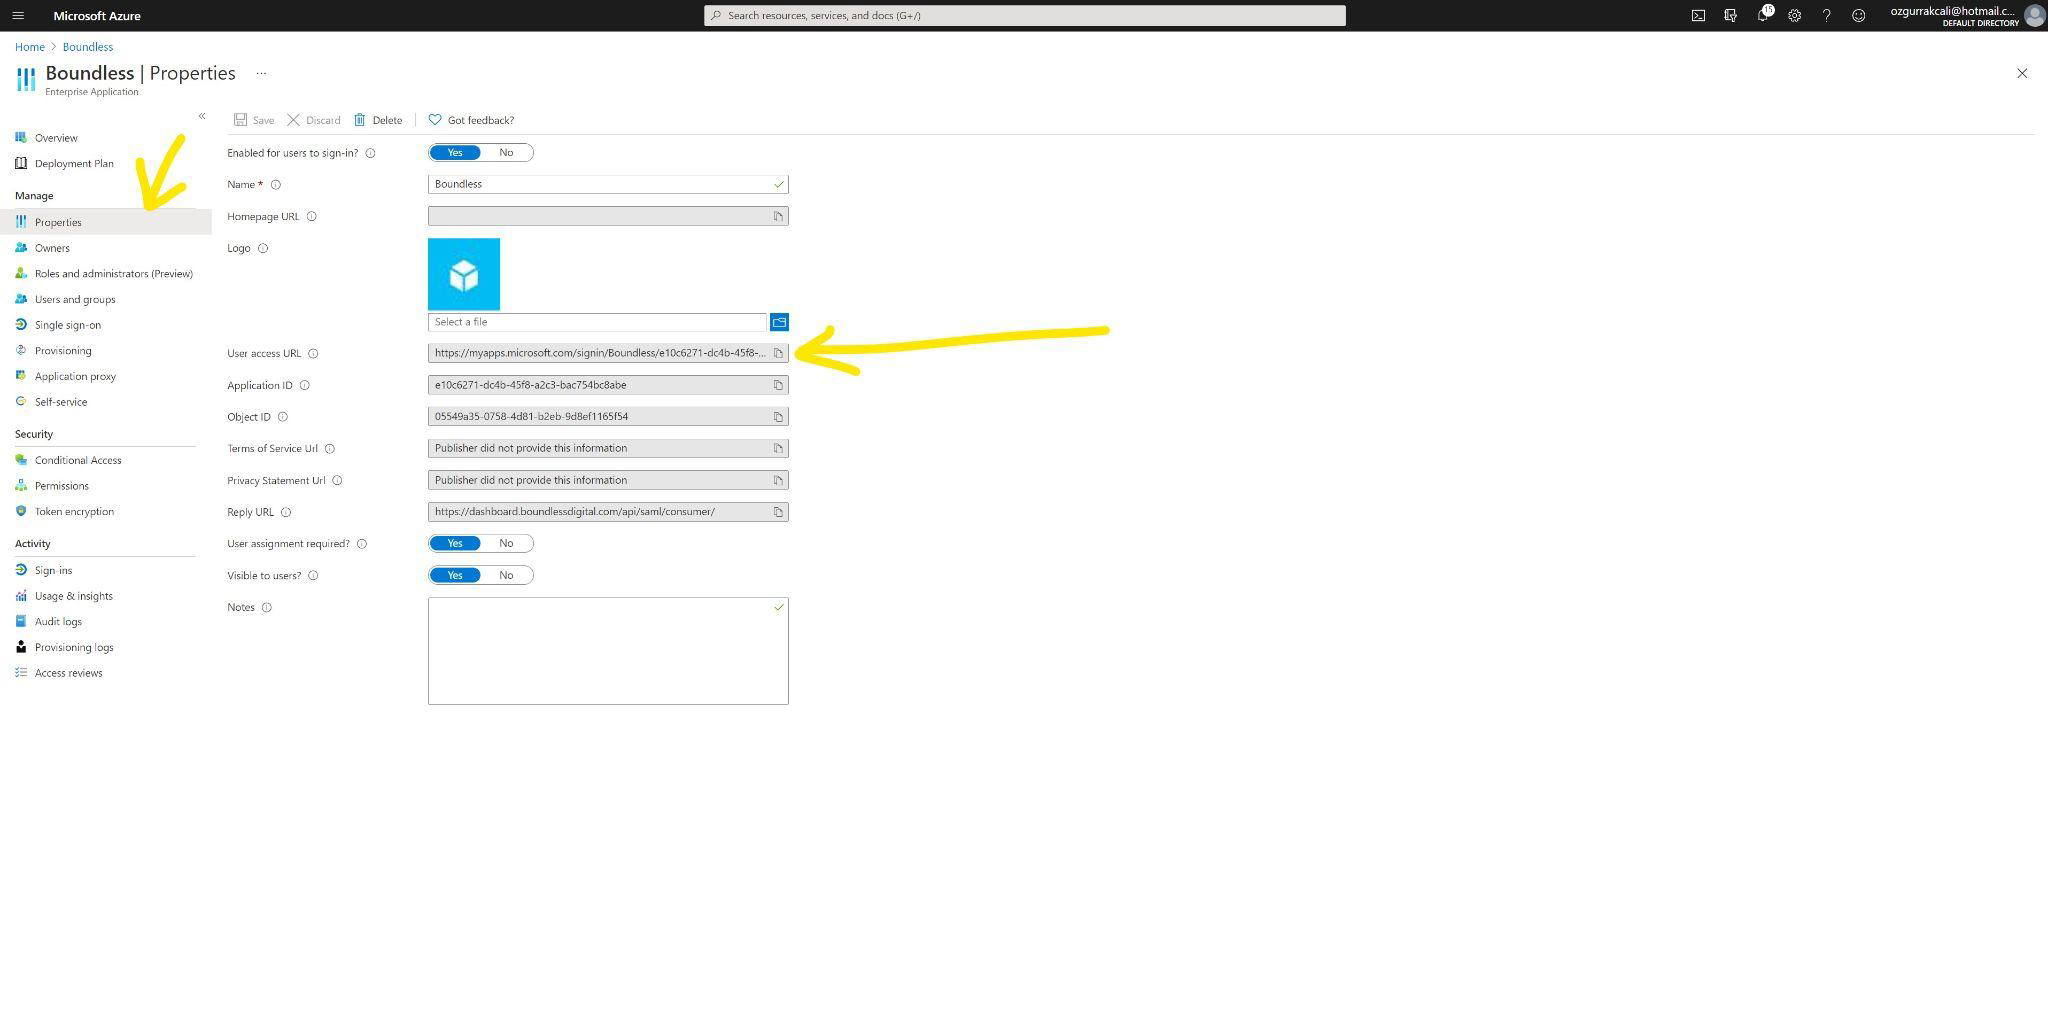
14 - Take note of User Access URL on Properties screen
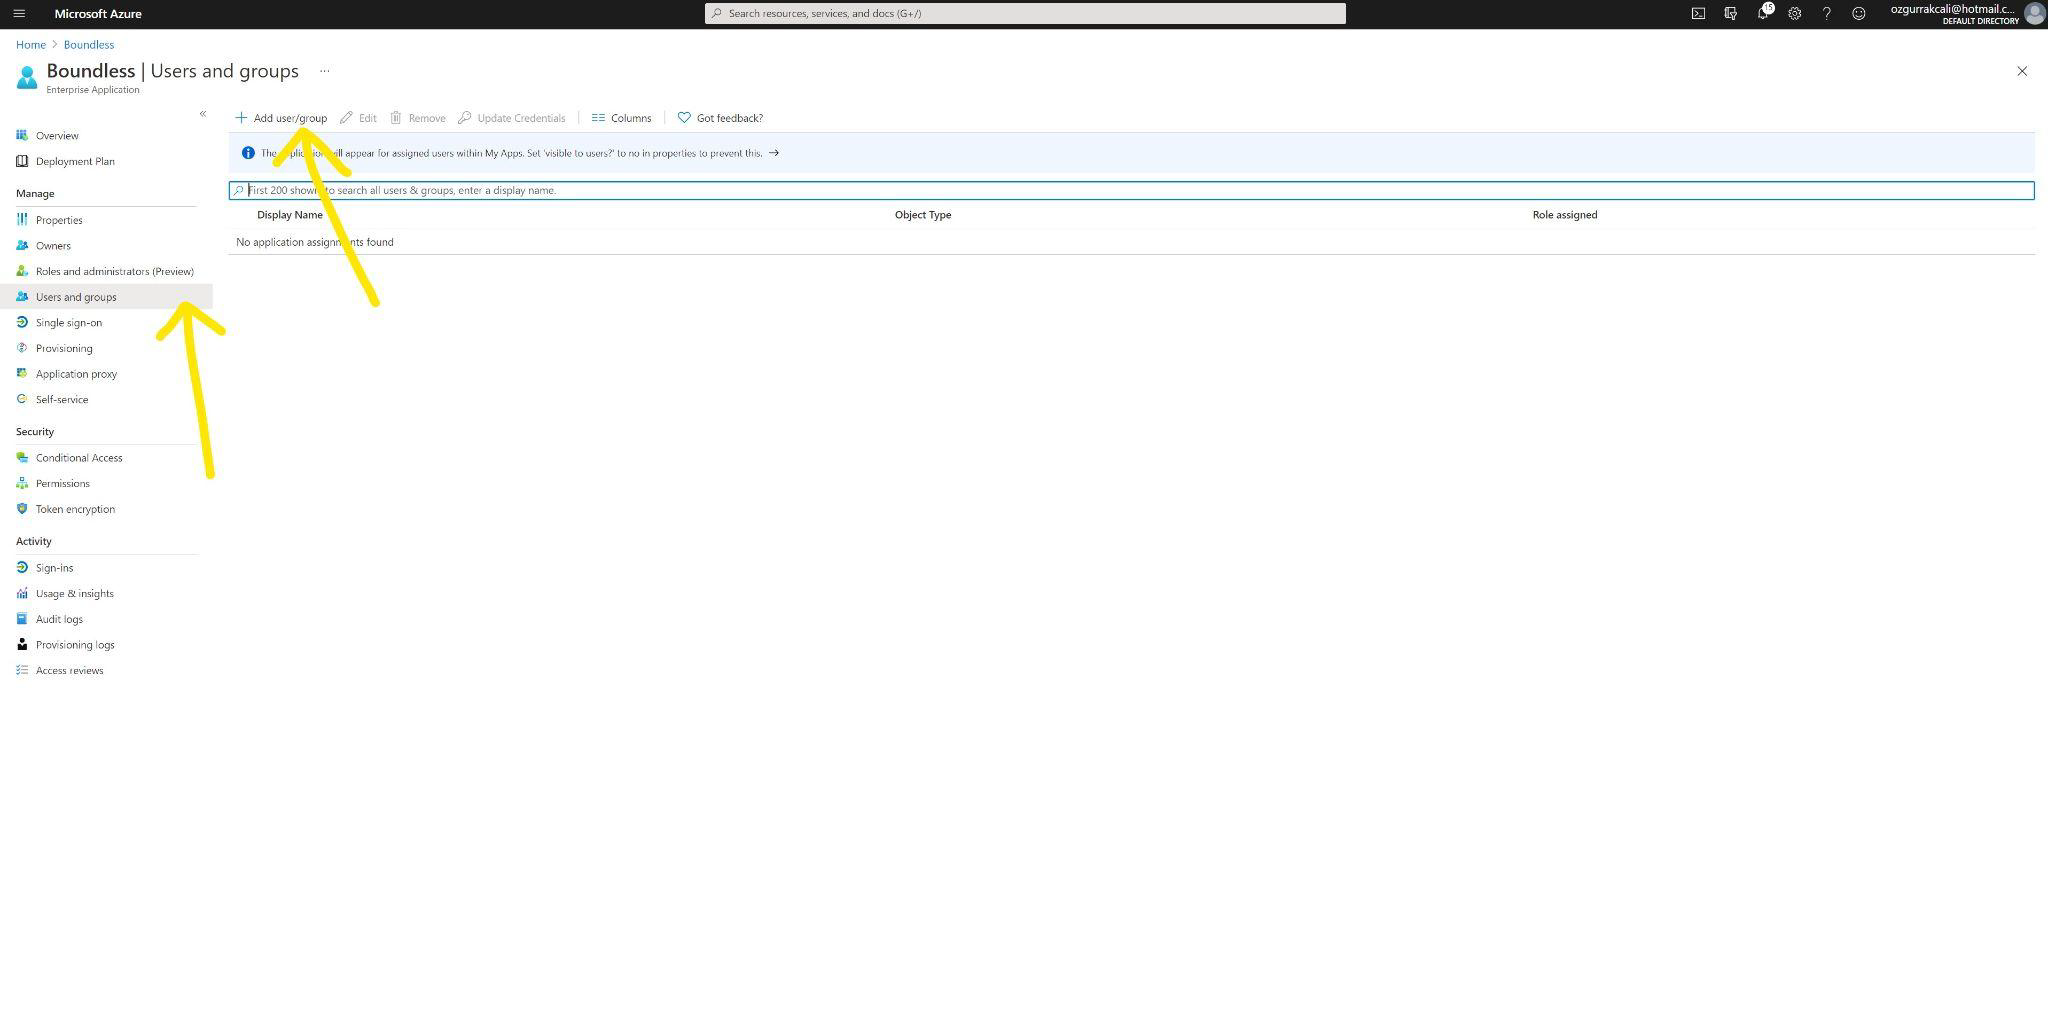
15 - Assign users to this application. Only the users assigned to the application can log in to Boundless.
16 - With this, configuration on Azure AD side is complete. Now go back to Boundless dashboard to complete configuration on Boundless side.
17 - Enter the User Access URL you noted on step #14 into Provider login url field