Safeguard is currently in prerelease status. As we continue to refine and enhance this product, you may notice occasional unexpected behavior or variations in performance. Your feedback during this pre-release phase is invaluable — please share any issues or suggestions with our support team to help us deliver the best possible experience for general availability.
Overview
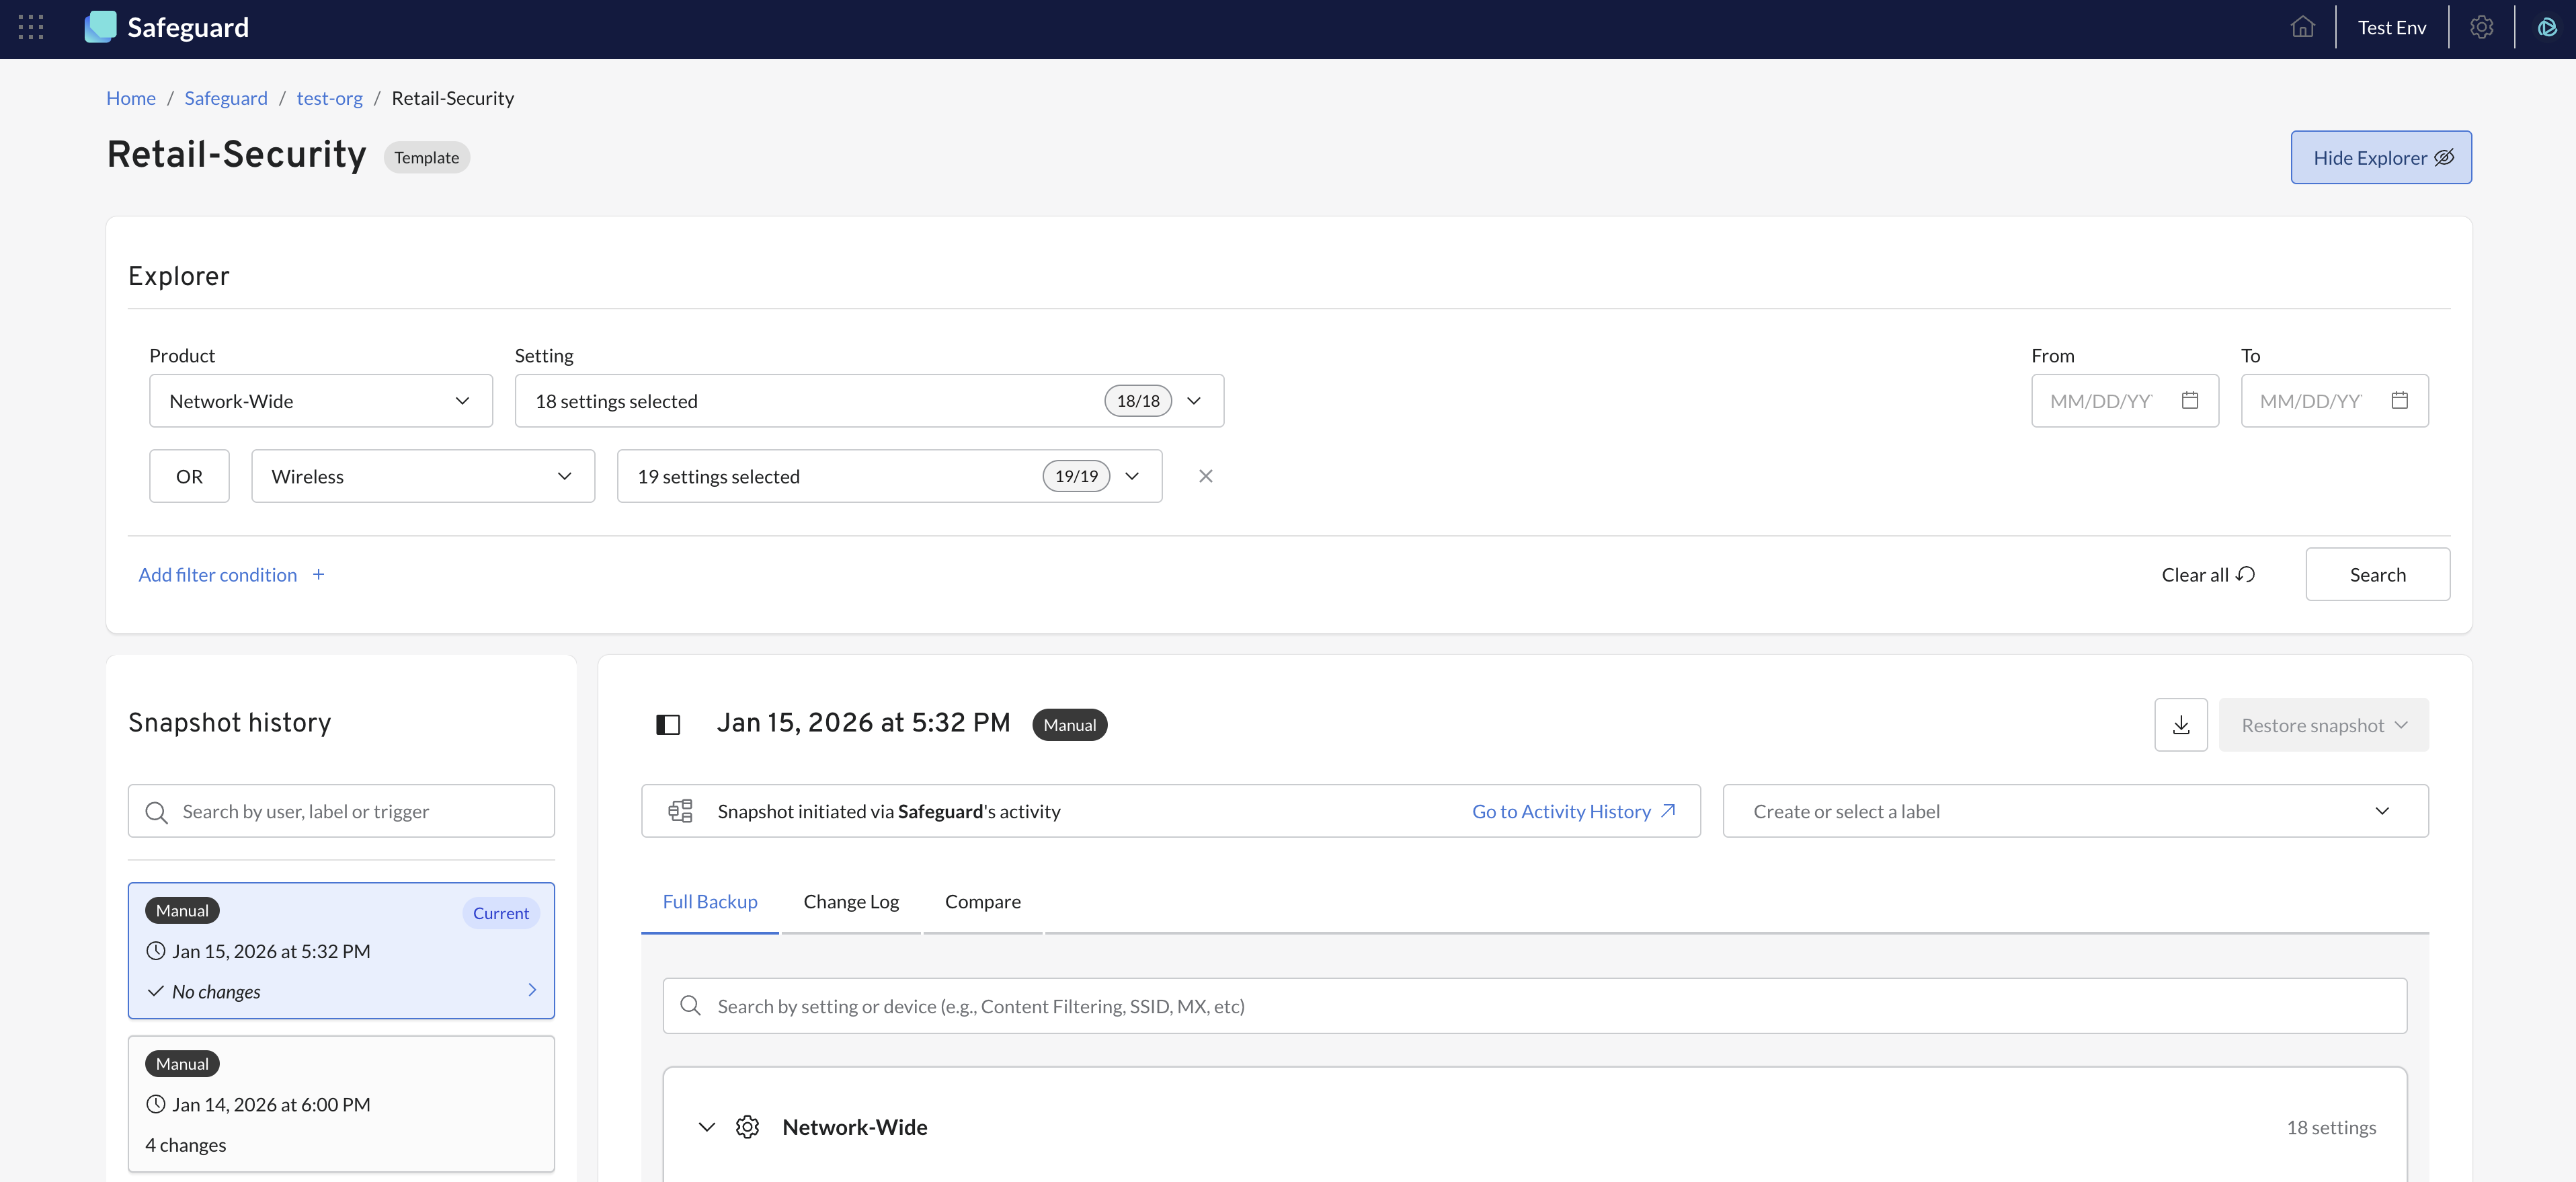
The Explorer is a powerful search and filtering tool that helps you quickly identify specific Snapshots based on configuration changes and date ranges.
Instead of manually scrolling through hundreds of snapshots, use the Explorer to find exactly the snapshots that captured changes to the configurations you are investigating.
This guide explains how to use the Explorer to filter snapshot events easily and fast.
What is the Explorer?
The Explorer is a filtering panel located at the top of the Snapshot list. It allows you to narrow down your snapshot history by:
- Product categories (Organization, Network-wide, Wireless, Cameras, Per Device settings, etc.)
- Specific configuration parameters (SSIDs, Firewall Rules, VLANs, etc.)
- Date ranges (from a specific date, to a specific date, or both)
When to use the Explorer:
- To find snapshots that captured changes to specific settings (e.g., "Show me all snapshots where SSID configurations changed")
- To accelerate troubleshooting by filtering to relevant configuration areas (e.g., "Show me firewall rule changes in the last 30 days")
- Auditing specific configuration types across time
- Reducing clutter when you only care about certain products or settings
How to Use the Explorer
The Explorer uses a row-based filtering system where each row represents a search condition. Multiple rows are combined with an OR operator, meaning snapshots matching ANY of the rows will be displayed.
Step 1: Select a Product
- Click on the Product dropdown (first dropdown in the row)
- Choose the product category you want to filter by:
Available products vary by entity type:
For Organizations:
- Organization (for organization-level settings)
For Templates:
- Network-wide
- Wireless
- Switching
- Security & SD-WAN
- Cameras
- Sensor
- And more, depending on your Meraki products
For Networks:
- Network-wide
- Wireless
- Switching
- Security & SD-WAN
- Cameras
- Sensor
- Per Device settings
- And more, depending on your Meraki products
Step 2: Select Settings
- After selecting a Product, the Setting dropdown becomes enabled
- Click on the Setting dropdown (second dropdown in the row)
- Choose one or more configuration parameters you want to filter by
The Setting selector is multi-select - you can select multiple parameters within the same product category.
Examples of configuration parameters:
- Network-wide: Network Settings, Alerts Settings, Firmware Upgrades, SNMP, and more
- Wireless: SSIDs, Wireless Settings, RF Profiles, and more
- Security & SD-WAN: L3 Firewall Rules, L7 Firewall Rules, Content Filtering, Firewall Settings, and more
- Switching: Switch Settings, STP, Port Schedules
- Per Device: Device-specific configurations for switches, access points, appliances
Step 3: Add Date Filters (Optional)
Date filters work independently of product/setting filters and help narrow results to specific time periods:
From date:
- Select a start date to show only snapshots created on or after that date
- Leave empty to include all snapshots from the beginning
To date:
- Select an end date to show only snapshots created on or before that date
- Leave empty to include all snapshots up to the present
You can use:
- From date only: Show all snapshots from a specific date forward
- To date only: Show all snapshots up to a specific date
- Both dates: Show snapshots within a specific date range
- Neither date: No date filtering applied
Step 4: Search
Once you've configured your filters:
- Click the "Search" button to apply the filters
- The Snapshot History list updates to show only matching snapshots
Search button requirements:
- Enabled when you have Product OR any date filter set
- Disabled if you have selected no Product and no date filters
What happens when you search:
- Only snapshots that captured changes to your selected settings are displayed
- If using date filters, only snapshots within the date range are shown
- The snapshot count updates to reflect filtered results
- The Explorer panel remains open so you can refine your search
Adding Multiple Filter Conditions (OR Logic)
You can create up to 10 filter rows to search across multiple products or settings simultaneously. Rows are combined with OR logic.
How to Add More Rows
- Click the "Add filter condition" button at the bottom left of the Explorer panel
- A new row appears below your existing filter(s)
- Each new row has:
- An "OR" label (indicating the logical operator)
- Product dropdown
- Setting dropdown
- Remove button (X icon)
How OR Logic Works
Example scenario:
- Row 1: Product = "Wireless" + Settings = "SSIDs"
- Row 2: Product = "Security & SD-WAN" + Settings = "L3 Firewall Rules"
Result: Snapshots are displayed if they contain changes to SSIDs OR L3 Firewall Rules (or both).
Another example with date filters:
- Row 1: Product = "Network-wide" + Settings = "SNMP"
- Date filters: From = "January 1, 2025"
Result: Snapshots from January 1, 2025 onward that contain changes to SNMP settings.
Managing Filter Rows
To remove a row:
- Click the X button on the right side of the row
- The row is immediately removed and doesn't affect your search until you click "Search" again
Maximum of 10 filter rows. The "Add filter condition" button becomes disabled at 10 rows.
Clearing Filters
To reset the Explorer and view all snapshots again:
Option 1: Clear All button
- Click the "Clear all" button at the bottom right
- All filters are cleared immediately:
- Product selections reset
- Setting selections cleared
- Date filters removed
- All additional filter rows removed
- The full snapshot list is restored automatically
Option 2: Manual clearing
- Remove individual selections from dropdowns
- Clear date pickers
- Remove filter rows one by one
- Click "Search" to update results
Explorer Use Cases and Examples
Use Case 1: Finding SSID Configuration Changes
Scenario: You need to find all snapshots where wireless SSID settings were modified.
Steps:
- Select Product: "Wireless"
- Select Setting: "SSIDs"
- Click "Search"
Result: Only snapshots that captured changes to SSID configurations are displayed.
Use Case 2: Auditing Firewall Rule Changes Over Time
Scenario: You want to review all firewall rule changes made in Q4 2024.
Steps:
- Select Product: "Security & SD-WAN"
- Select Settings: "L3 Firewall Rules", "L7 Firewall Rules"
- Set From date: October 1, 2025
- Set To date: December 31, 2025
- Click "Search"
Result: Snapshots from Q4 2024 that contain L3 or L7 firewall rule changes.
Use Case 3: Multi-Category Troubleshooting
Scenario: Network issues started yesterday. You want to check changes to wireless settings, switching settings, or device configurations.
Steps:
- Row 1: Product = "Wireless" + Settings = "SSIDs", "Wireless Settings"
- Click "Add filter condition"
- Row 2: Product = "Switching" + Settings = "Switch Settings", "STP"
- Click "Add filter condition"
- Row 3: Product = "Per Device settings" + Select relevant device settings
- Set From date: Yesterday's date
- Click "Search"
Result: All snapshots from yesterday that contain changes to wireless, switching, or per-device settings.
Use Case 4: Organization-Level Policy Changes
Scenario: Find when organization-level policies were modified.
Steps:
- Select Product: "Organization"
- Select Settings: "Adaptive Policy Groups", "Adaptive Policy Policies", "Policy Objects"
- Click "Search"
Result: Snapshots capturing changes to organization-level policy configurations.
Understanding Explorer Results
After applying filters, the Snapshot Events list updates to show only matching results: What you'll see:
- Chronological order maintained: Most recent matching snapshots appear first
- Full snapshot details: Each matching snapshot shows timestamp, label, trigger source, and "Changed By" information
- Explorer panel stays open: Allows you to refine or adjust filters
If no snapshots match:
- The list will be empty
- Message indicates "No snapshots match your filter criteria"
- Try adjusting your filters:
- Expand date range
- Add more settings to your selection
- Add additional filter rows with OR conditions
Viewing filtered snapshot details:
- Click any filtered snapshot to view its contents in the Snapshot Viewer
- All three tabs (Full Backup, Change Log, Compare) work normally with filtered snapshots
Explorer Tips and Best Practices
Start broad, then narrow:
- Begin with just a Product and see how many results you get
- Add specific Settings to narrow down further
- Apply date filters last to focus on a specific timeframe
Use multiple rows for comprehensive searches:
- Don't limit yourself to one product category
- Add rows for related products that might be involved in an issue
- Remember: rows use OR logic, so you'll see snapshots matching ANY condition
Date filtering strategies:
- Troubleshooting: Set "From" date to when issue started
- Compliance audits: Set date range for audit period
- Recent changes: Set "From" date to last week/month
- Historical analysis: Use full date range to see evolution over time
Save time with multi-select:
- Select multiple related settings in the Setting dropdown
- Example: Select all firewall-related settings at once instead of creating multiple rows
Remember:
- Product selection is single-select per row
- Setting selection is multi-select (select as many as needed)
- Maximum 10 filter rows
- Search requires (Product + Settings) OR date filters
- Changing Product clears your Setting selections
Common Questions
Q: Can I search for snapshots that don't have changes to a specific setting?
A: No, the Explorer is designed to find snapshots that DO contain changes to selected settings. It doesn't support inverse filtering (showing snapshots without changes).
Q: Do filter rows use AND or OR logic?
A: Multiple filter rows use OR logic. Snapshots matching ANY row will be displayed. Within a row, selecting multiple Settings also uses OR logic (snapshots with changes to ANY of the selected settings are shown).
Q: Can I save my filter configurations for reuse?
A: Filter configurations are not currently saved between sessions. You'll need to reconfigure your filters each time you open the Snapshot Explorer.
Q: Why don't I see certain Products in the dropdown?
A: Available products are filtered based on your organization's product type history. You'll only see products relevant to the selected entities.
Q: What's the difference between the Explorer and the search bar in the Snapshot History list?
A: While the Explorer filters snapshots based on configuration changes (which settings changed), the search bar in Snapshot History list searches snapshot metadata (timestamp, labels).