Pre-requisites
To use Boundless User Management for the first time, please ensure that you’ve connected the Boundless dashboard to your Meraki dashboard by using your Meraki API key.
Also, you would need to import the organizations on which you wish to create or edit users using the User Management tool. This can be done by simply clicking the Add Meraki Organizations button under the Organizations tab.
What is the User Management tool
Included is part of the Boundless Access Control solution, the User Management feature allows you to create, edit or delete users in mass across many Meraki organizations.
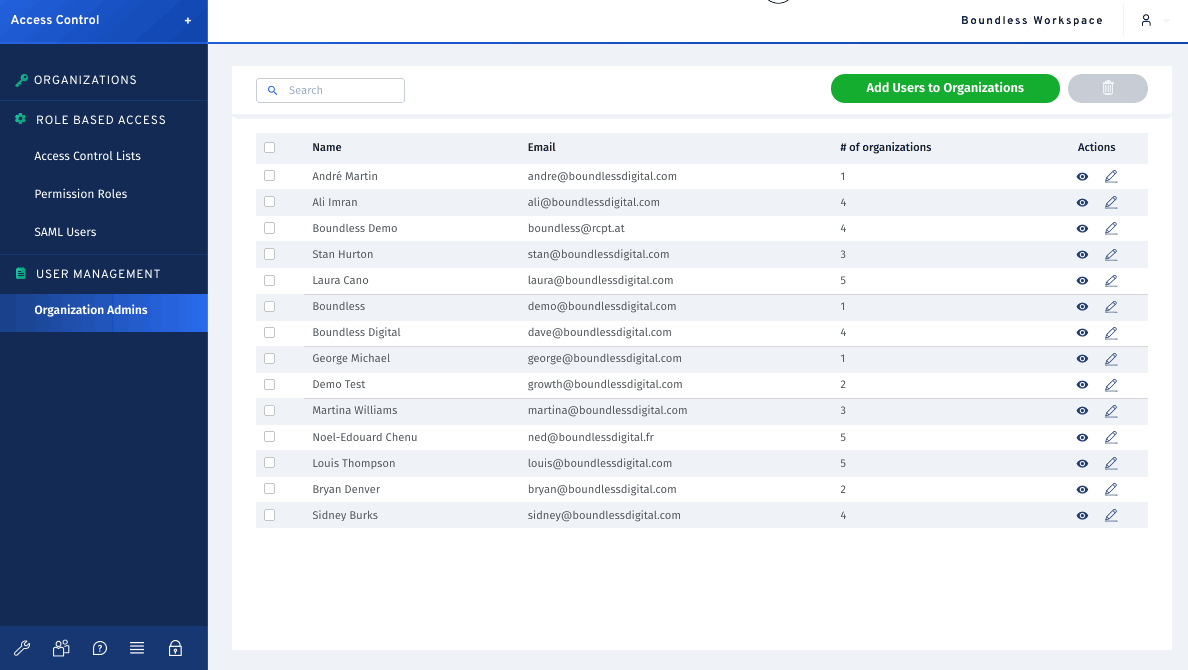
User Management allows you to add a new user to all your organizations in one go. Simply enter the User (or administrator) and select which organizations you want to grant them access to. Then go ahead and create the access.

The User Management tool is also particularly useful for deleting users in bulk. You can simply click on a User to see all of the organizations that they have access to.
After doing so, you can also remove a selected user from all of their organizations. This is of great benefit if you’ve recently had a member leave your team, as manually having to delete them from each organization can take up a lot of time that could have been spent more productively.