If you're using Boundless Next Generation, these instructions don't apply to your workspace.
Connect your Meraki organization to Boundless
Before adding your Meraki API key to the Boundless Platform, there are a couple of steps you should follow first:
Step 1 | Prerequisites
Before using the Meraki API, ensure you have:
• A Meraki Dashboard account with administrative access
• Organization-level access to enable API functionality
• Basic understanding of REST APIs and HTTP methods
Step 2 | Generate your Meraki API Key
you can generate your new API key (if you haven't done so already). This can be done on your Profile.
Just scroll down to Generate new API key (once generated, make sure you save your API key in a safe place, as you can't retrieve it again once leaving this page).
If you need any additional guidance, check out the short video we've prepared to show you how to do it.
Alternative Step 2 | Generate your Meraki API Key
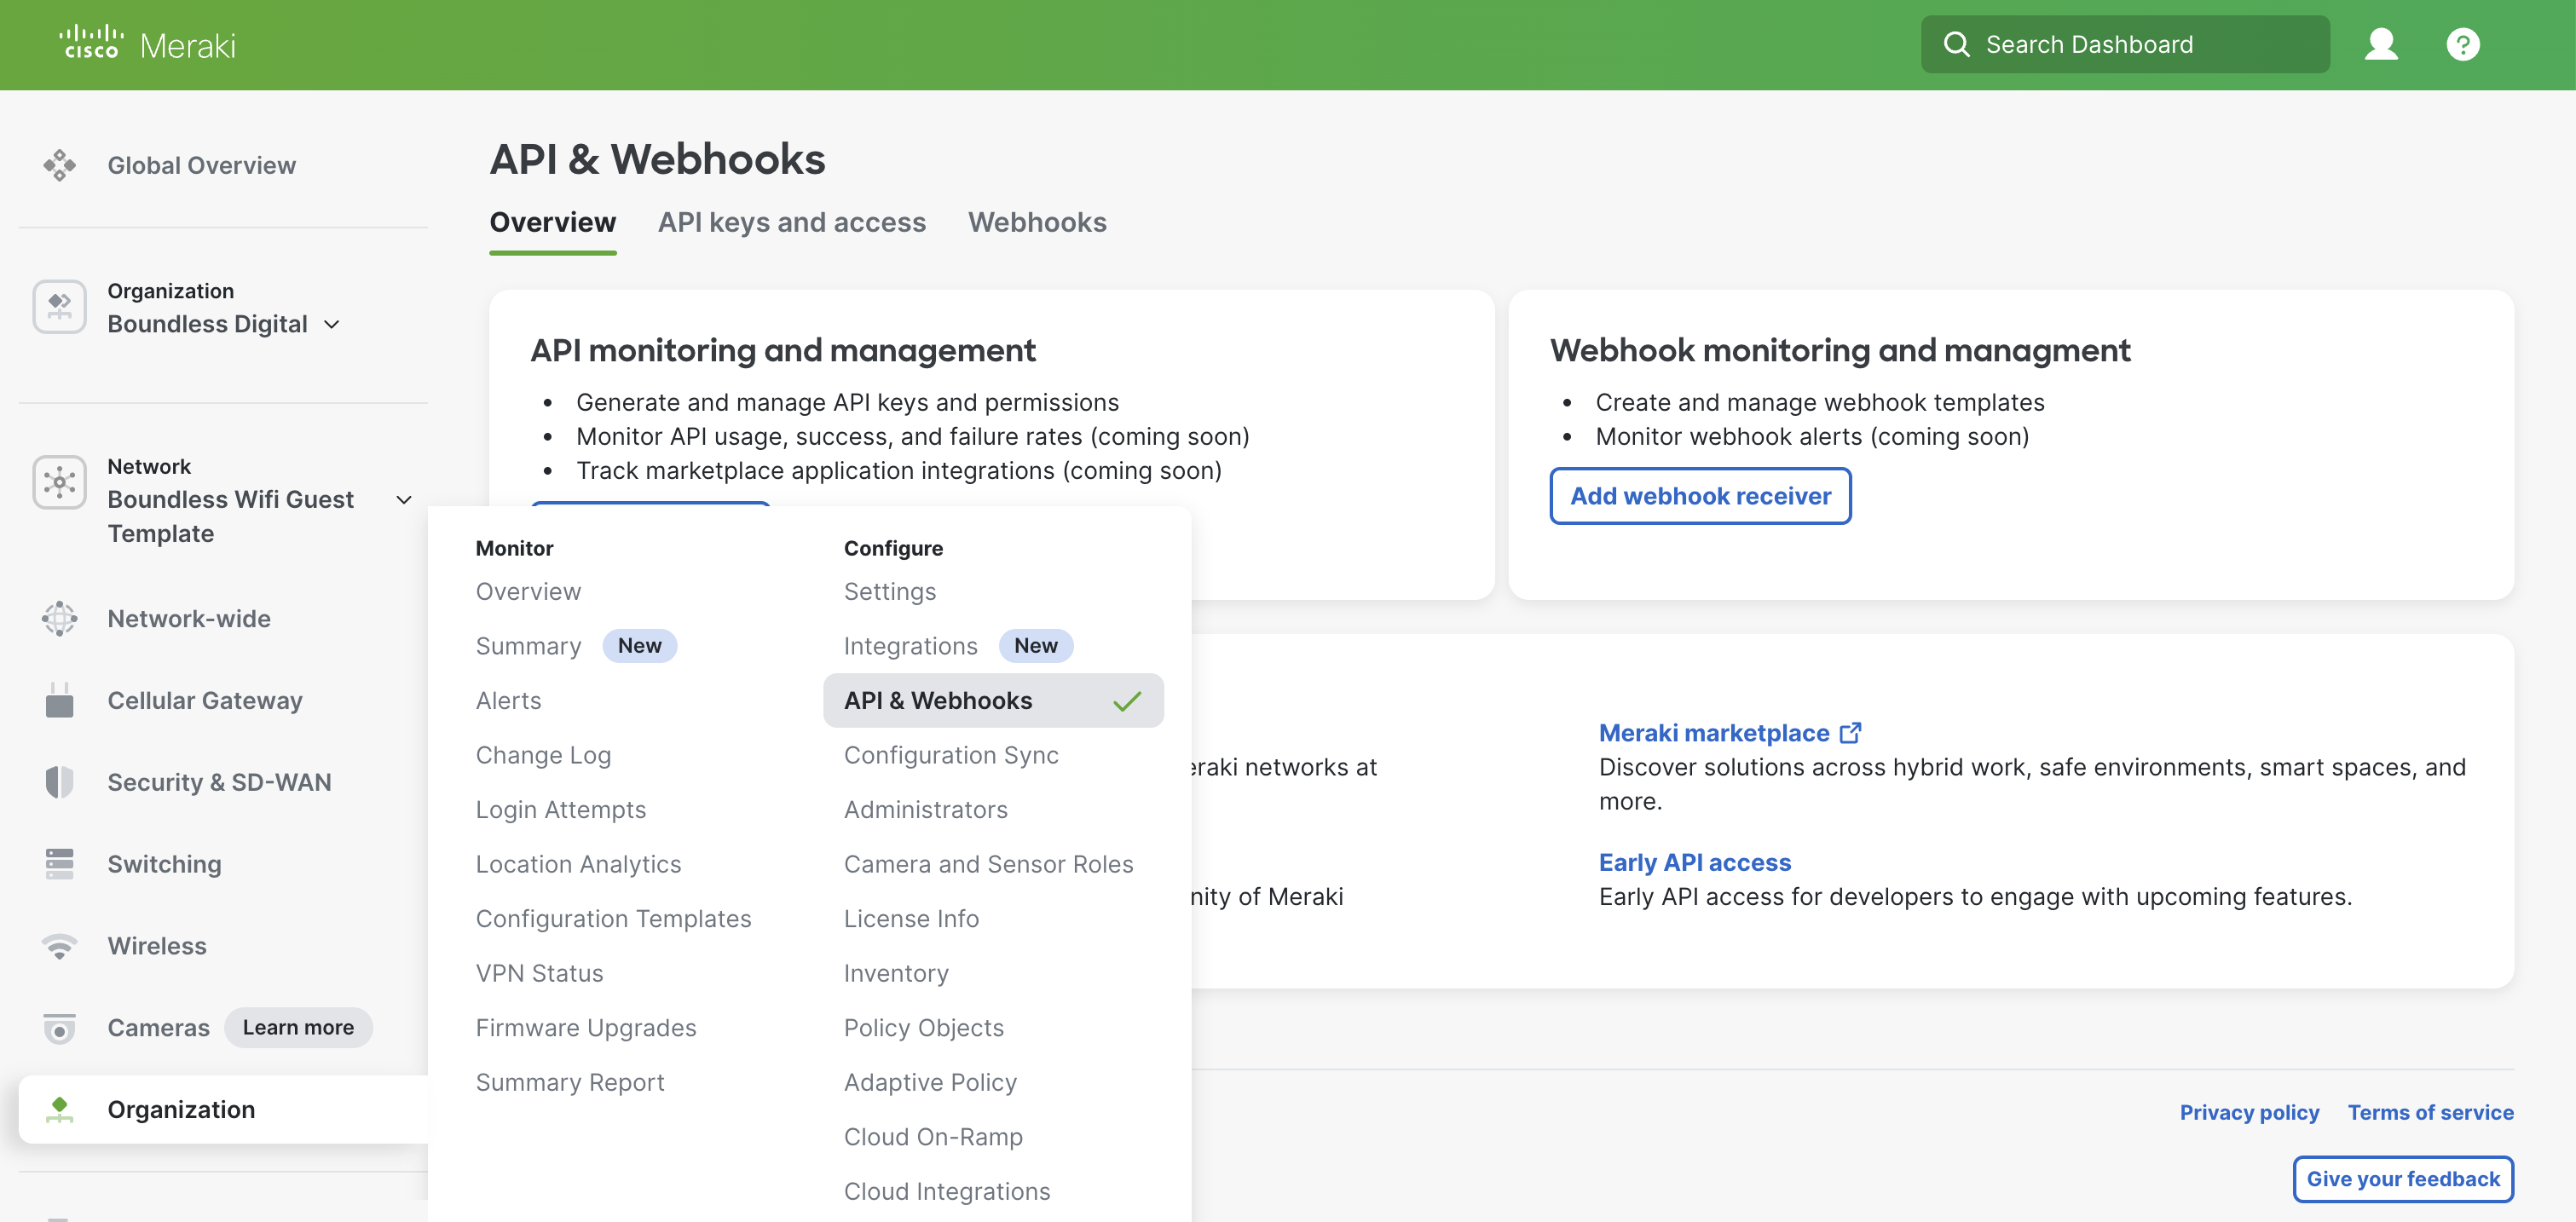
You can also generate your API key and access to the existing API keys through the Organization menu.
Simply go to Organization > Configure > API& Webhooks.